Managing projects without a solid resource plan can lead to missed deadlines, overworked teams, and wasted budgets.
Resource planning helps teams allocate people, tools, time, and budget effectively, ensuring smooth project execution.
In this guide, you’ll learn:
- What resource planning is and why it matters
- Key steps to create an effective resource plan
- Common challenges and best practices for success
What is resource planning in project management?
Resource planning in project management is the process of managing and allocating resources—people, tools, time, and budget—to ensure projects are completed efficiently.
The resource planning process typically involves:
- Knowing who is available: Checking team members’ schedules, skills, and workload to make sure no one is overloaded or sitting idle.
- Assigning tasks to the right people: Matching tasks to team members based on their skills and availability so work gets done efficiently and to a high standard.
- Keeping workloads balanced: Spreading out tasks evenly across the team to avoid burnout and make sure everyone is contributing.
- Staying flexible when things change: Adjusting plans when deadlines shift, new work comes in, or unexpected challenges arise.
Resource planning example
Think about a software development team working on a new app.
- Without resource planning: Tasks like coding, testing, and writing instructions might get assigned randomly, causing delays or mistakes.
- With resource planning: The best coder works on the app’s main features, the tester focuses on finding bugs, and the writer creates clear instructions for users.
By assigning tasks based on expertise, the project stays on track, quality improves, and the team avoids unnecessary stress.
Why resource planning is important for teams
Resource planning makes sure your team’s time and skills are used wisely, helping projects run smoothly and increasing profitability, and overall success.
Here’s what you’ll gain:
- Stronger project teams: Match the right people to the right projects. For example, assign a senior developer to lead a complex app launch while giving a junior designer smaller tasks to help them grow.
- Balanced workloads: Avoid burnout and inefficiency by splitting tasks evenly. For instance, divide a 40-hour workload between two designers to keep productivity high
- Fewer mistakes: Clear roles and schedules prevent issues like duplicate work, missed deadlines, or handoff errors between teams
- Faster project delivery: Identify and resolve scheduling conflicts—like two projects competing for the same resource—before they cause delays
- Happier teams: Manageable workloads and clear expectations keep your team engaged, productive, and motivated.
If planning resources isn’t part of a business’s daily routine, it’s like sailing in thick fog. The boat is moving, but you can’t see the icebergs ahead. Sooner or later, you’ll realize you either don’t have enough people for the work or enough work for the team.
How to do resource planning for you next project
Effective resource planning ensures your project runs smoothly, stays on schedule, and doesn’t overburden your team.
Here’s a step-by-step guide to planning and managing resources for your next project.
Step 1: Outline the project’s work and estimated hours
Before assigning resources, you need a clear and structured plan of what needs to be done. Without this, you risk misallocating resources, causing delays, and overloading your team.
A Work Breakdown Structure (WBS) helps break a project into manageable phases, deliverables, and tasks, ensuring that every element is accounted for before assigning resources.
A WBS is a hierarchical visual breakdown of a project’s scope.
It divides the project into:
- Phases: The major stages of the project
- Deliverables: The key outcomes or milestones for each phase
- Tasks: The specific actions required to complete each deliverable
By structuring your project this way, you gain clarity on what needs to be done, the time required, and what resources will be needed.
For example, here’s what a WBS could look like for a website redesing project
| Phase | Deliverable | Task | Estimated hours | Assigned role |
|---|---|---|---|---|
| Research & Planning | Wireframes | Create website wireframes | 12 hours | UX Designer |
| Design | UI Mockups | Design website layout and branding | 20 hours | UI Designer |
| Design | Review & Feedback | Get stakeholder approval | 6 hours | Project Manager |
| Development | Front-End | Code HTML/CSS and implement design | 40 hours | Front-End Developer |
| Development | Back-End | Set up CMS and integrate features | 50 hours | Back-End Developer |
| Testing & Launch | QA Testing | Check functionality and fix bugs | 15 hours | QA Tester |
| Testing & Launch | Deployment | Publish the website live | 8 hours | DevOps Engineer |
You can use a tool like Scoro’s quote builder to begin resource planning early. Before the project even starts.
First, create a quote for the project, outlining the estimated hours for each service or task.
Next, assign roles or team members using the “Cost and provider info” section.
This indicates who will most likely deliver the work, whether a specific team member or a placeholder role.
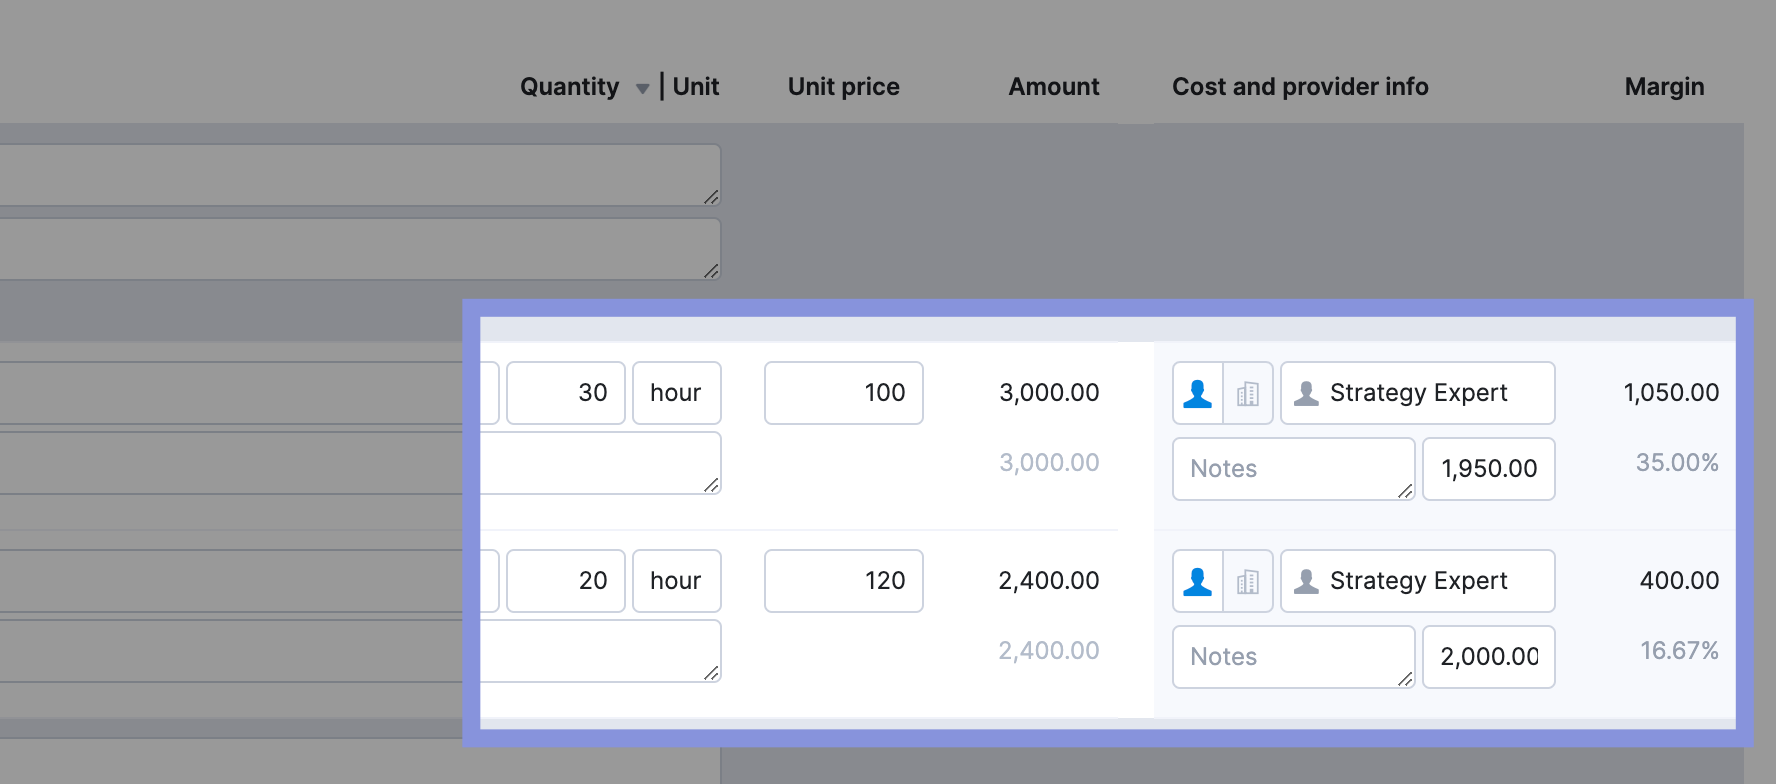
Once the quote is converted into a project, Scoro automatically transfers the assigned team members or role placeholders from the quote into the project’s resource plan.
Step 2: Assess your team’s resource availability and existing workloads
Now that you’ve outlined your project’s phases, deliverables, and estimated hours, the next step is to ensure your team has the capacity to execute the project on schedule.
This involves answering:
- Who has the capacity to take on this project?
- Are there any team members already overbooked or underutilized?
- Do timelines need adjusting to balance the workload effectively
In Scoro, you can turn your quote into a project by clicking “Create Project.”
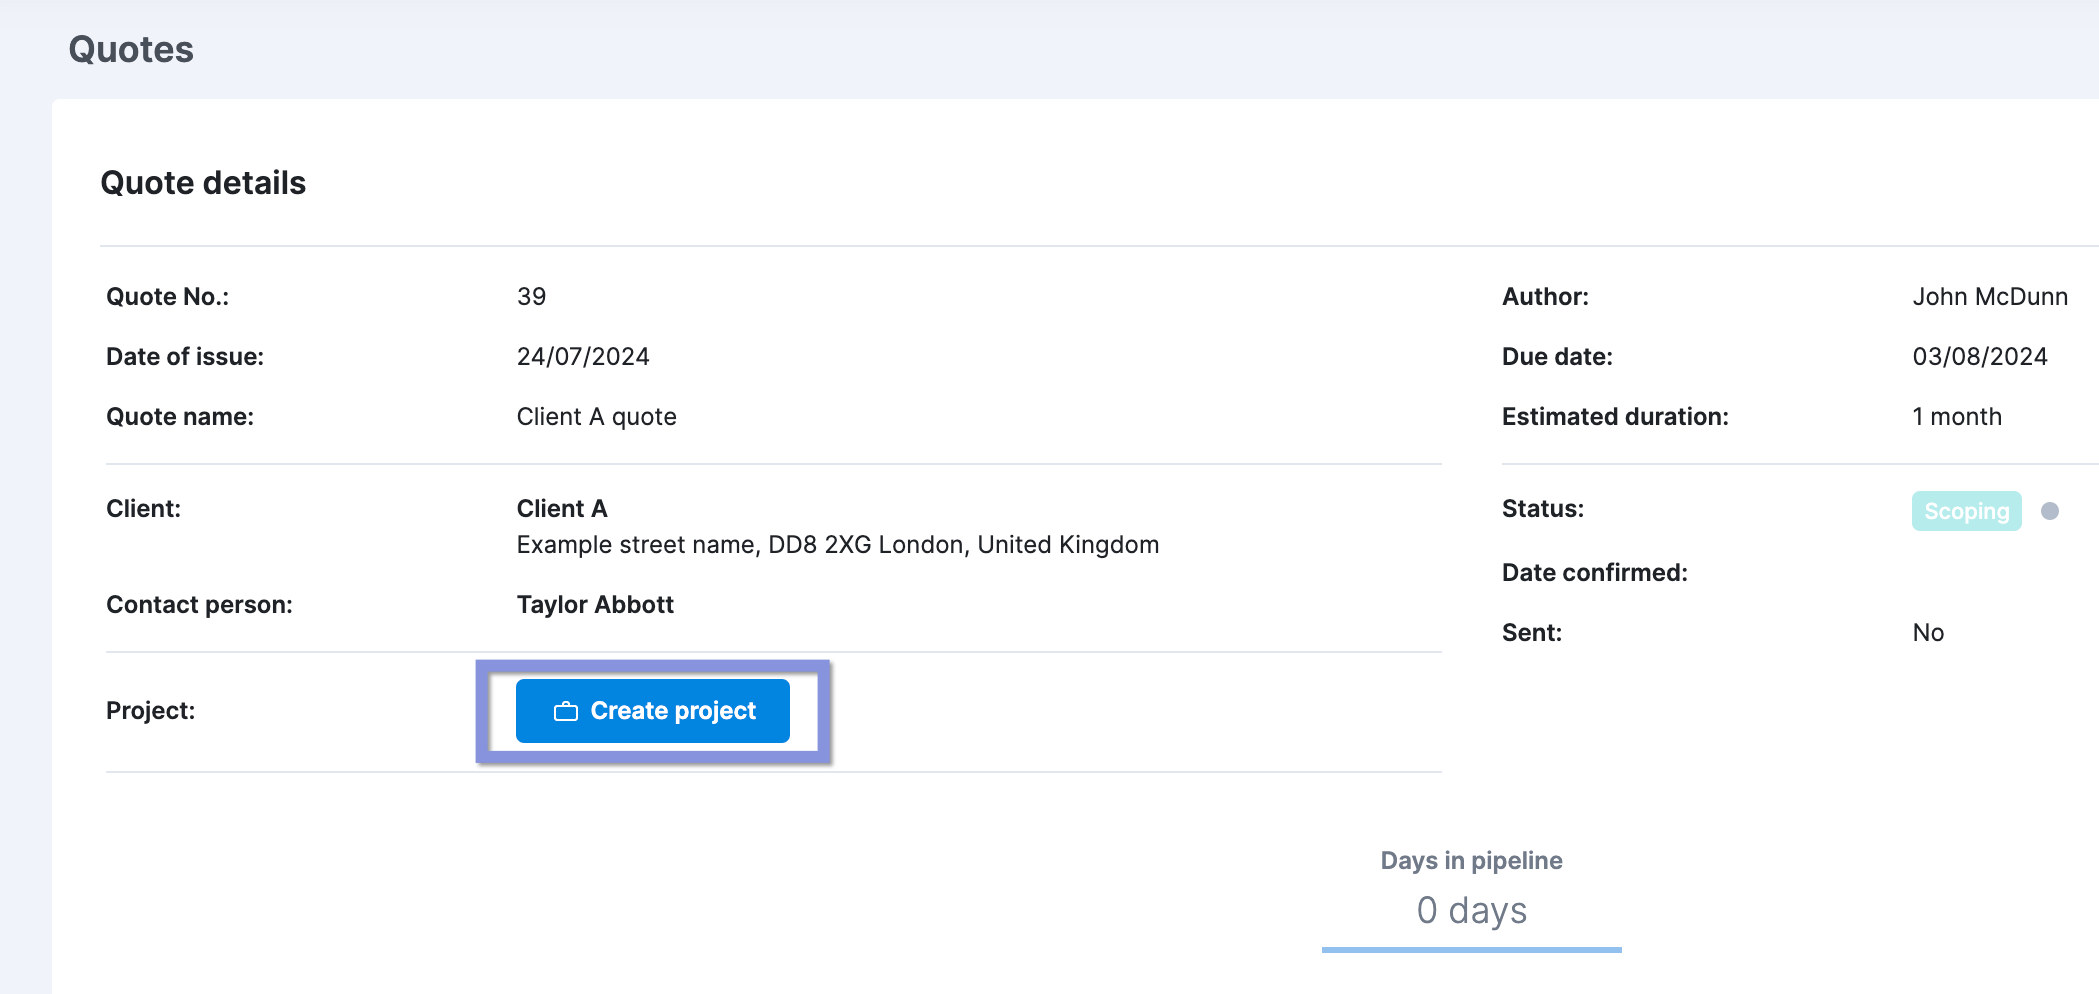
The people and roles listed in the quote will automatically become project members.
Any hours assigned in the quote will be converted into tentative bookings. Which you can view in the “Bookings” tab of your project.
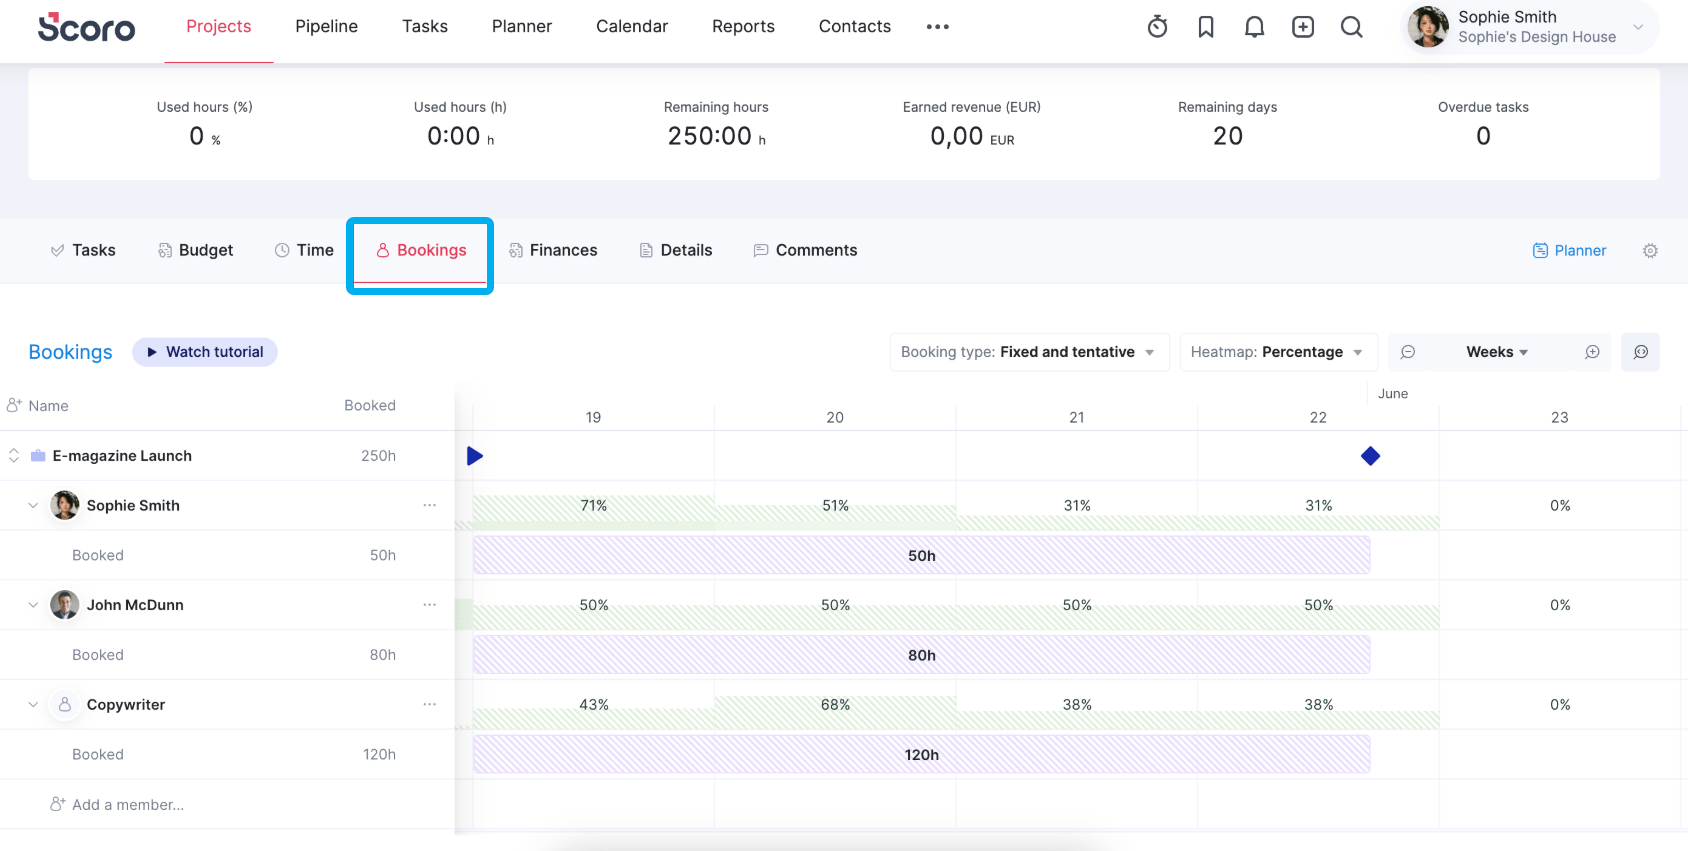
For example, if you quoted 50 hours for project management over four weeks, Scoro would split this time across 20 workdays, tentatively booking 2.5 hours per day.
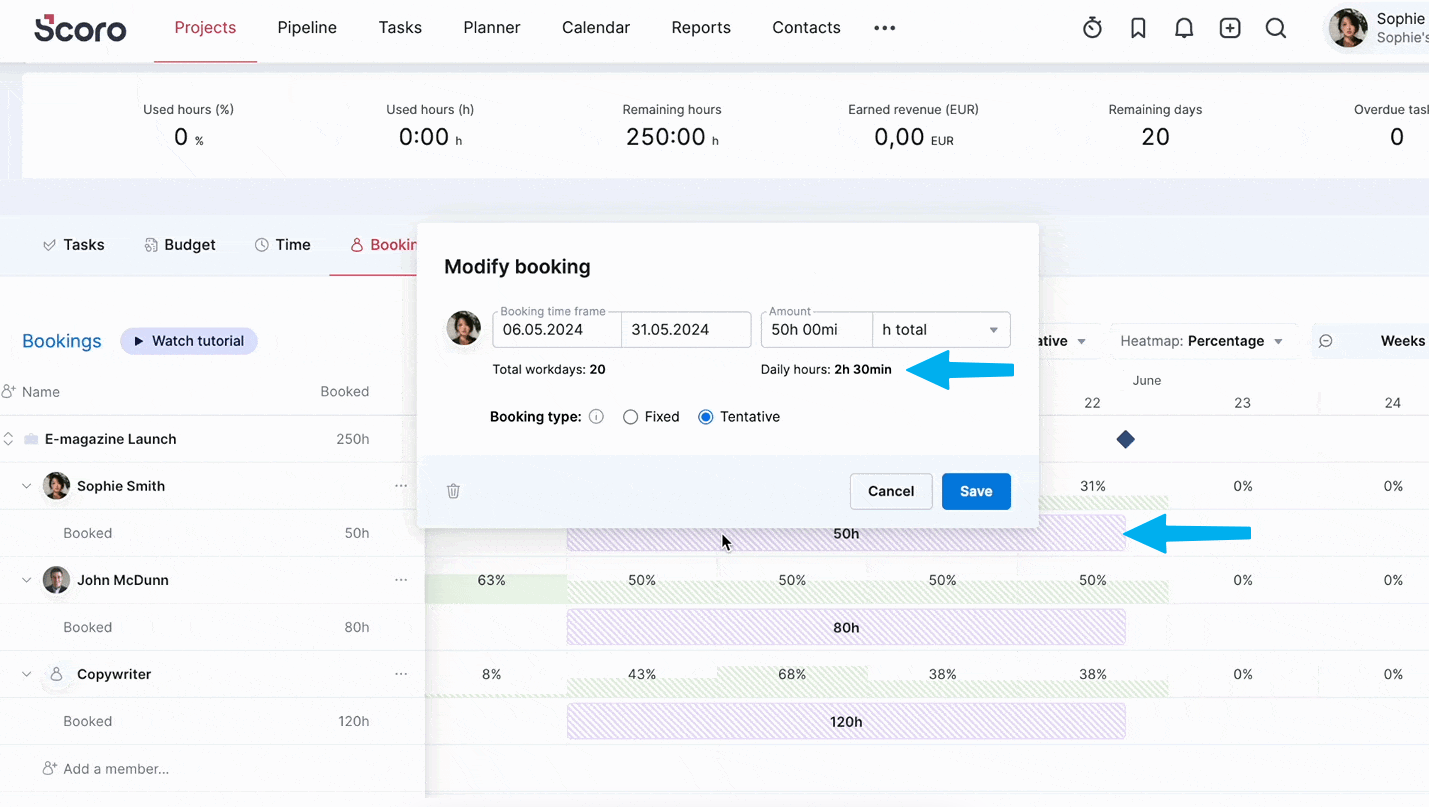
Inside the “Bookings” tab, similar to the heatmap in the “Bookings” module, a color-coded heatmap provides a visual representation of resource utilization:
- Green: Available time
- Red: Overbooked
- Purple: Unavailable time booked with tasks
- Striped: Tentative bookings that aren’t finalized (only available for roles, not individuals)
- Solid: Finalized bookings
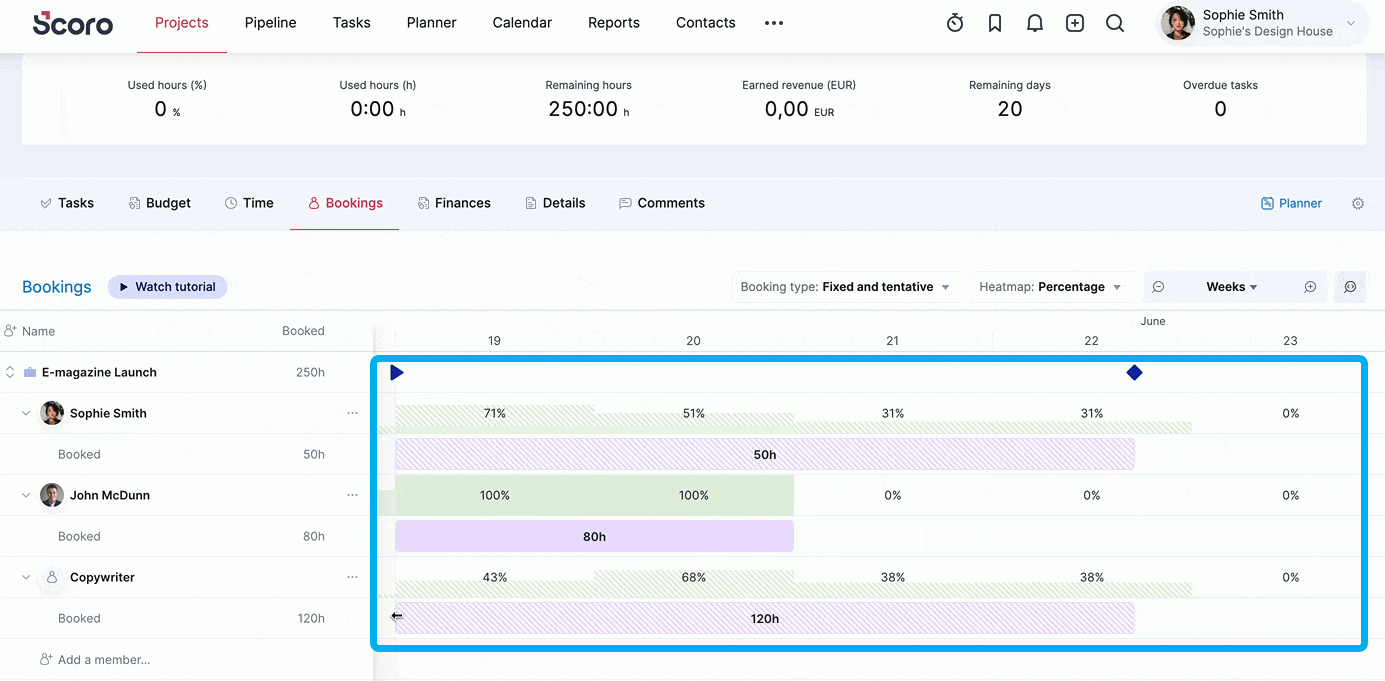
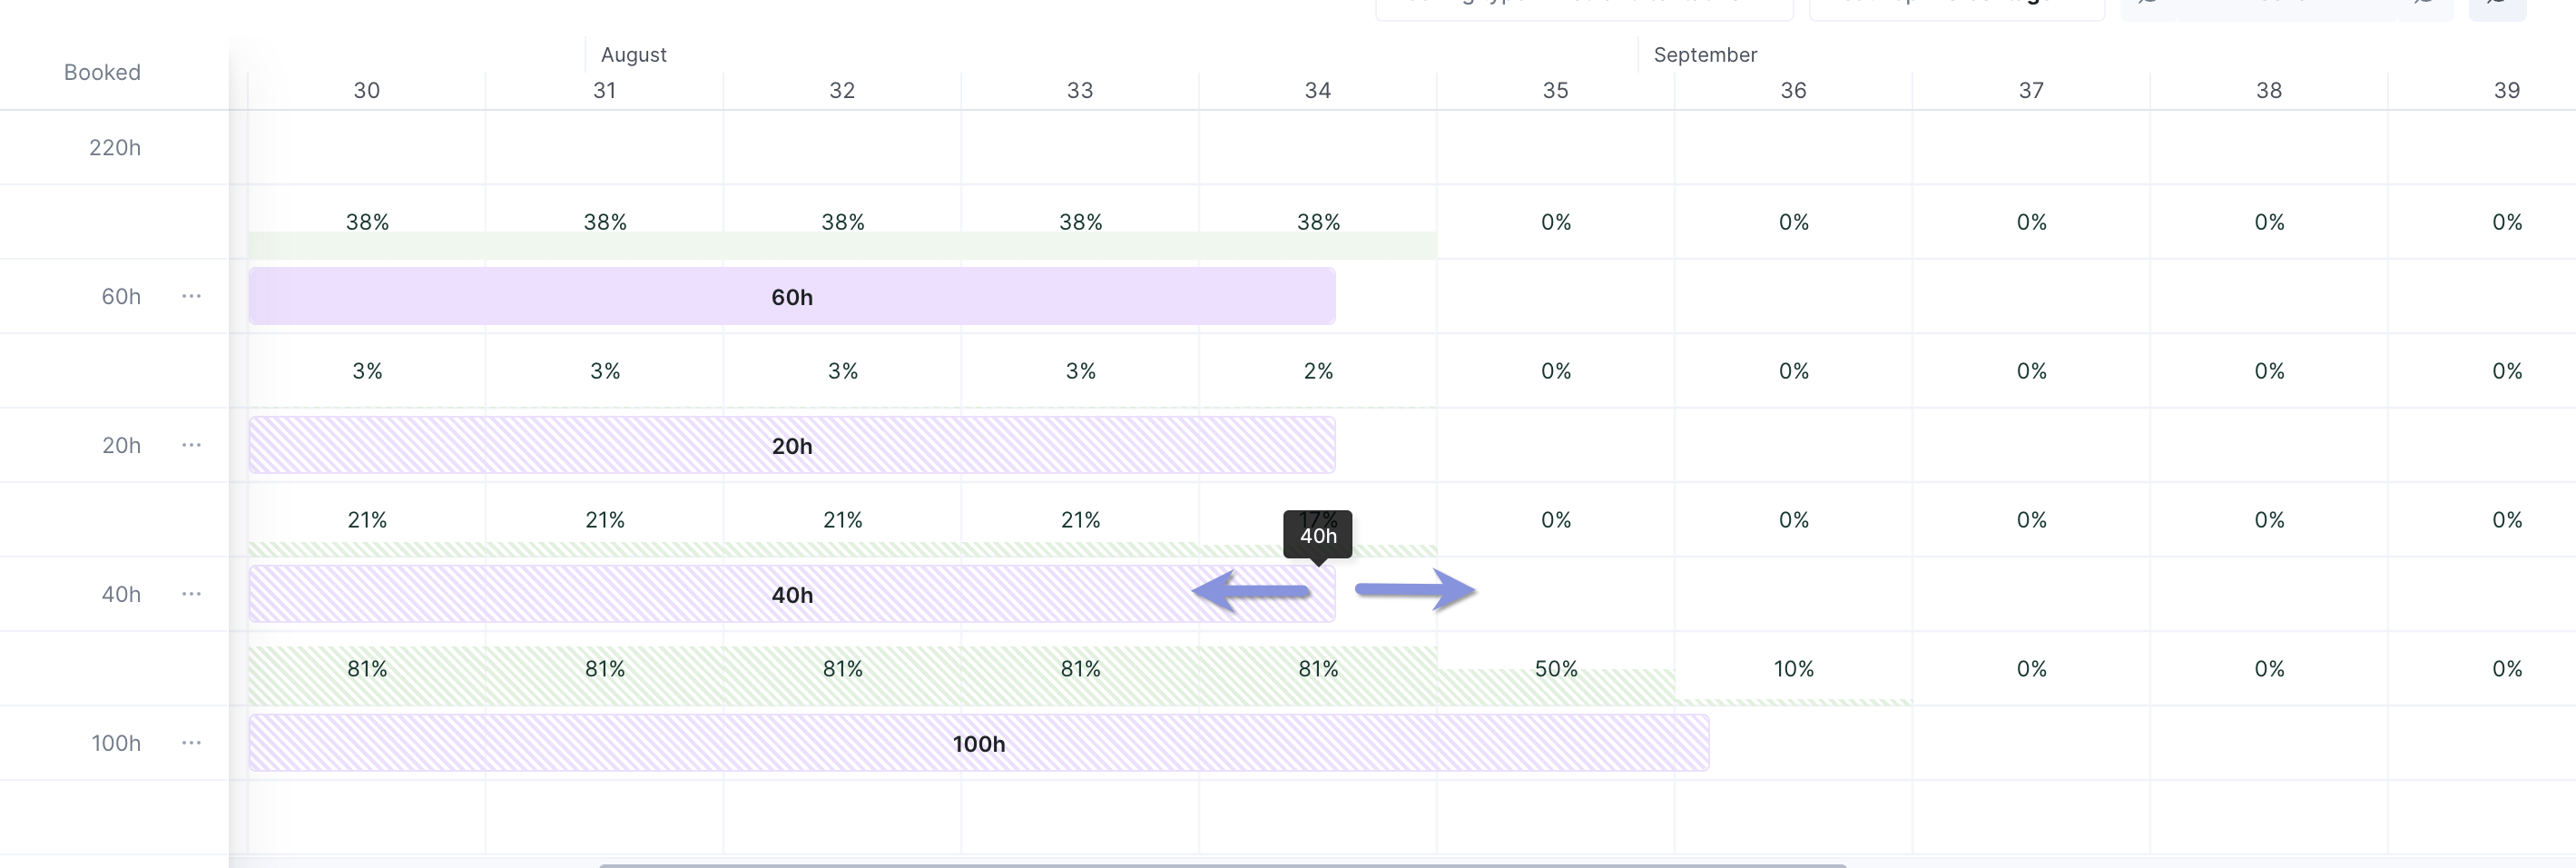
By showing how much of a team member’s total working hours are already booked, the heat map helps you quickly identify where time is over or under-utilized.
For example, you might see that the Senior Graphic Designer role is in the red zone for the next two weeks. You would then adjust booking timeframes by dragging and resizing the booking blocks to better align with your project schedule.
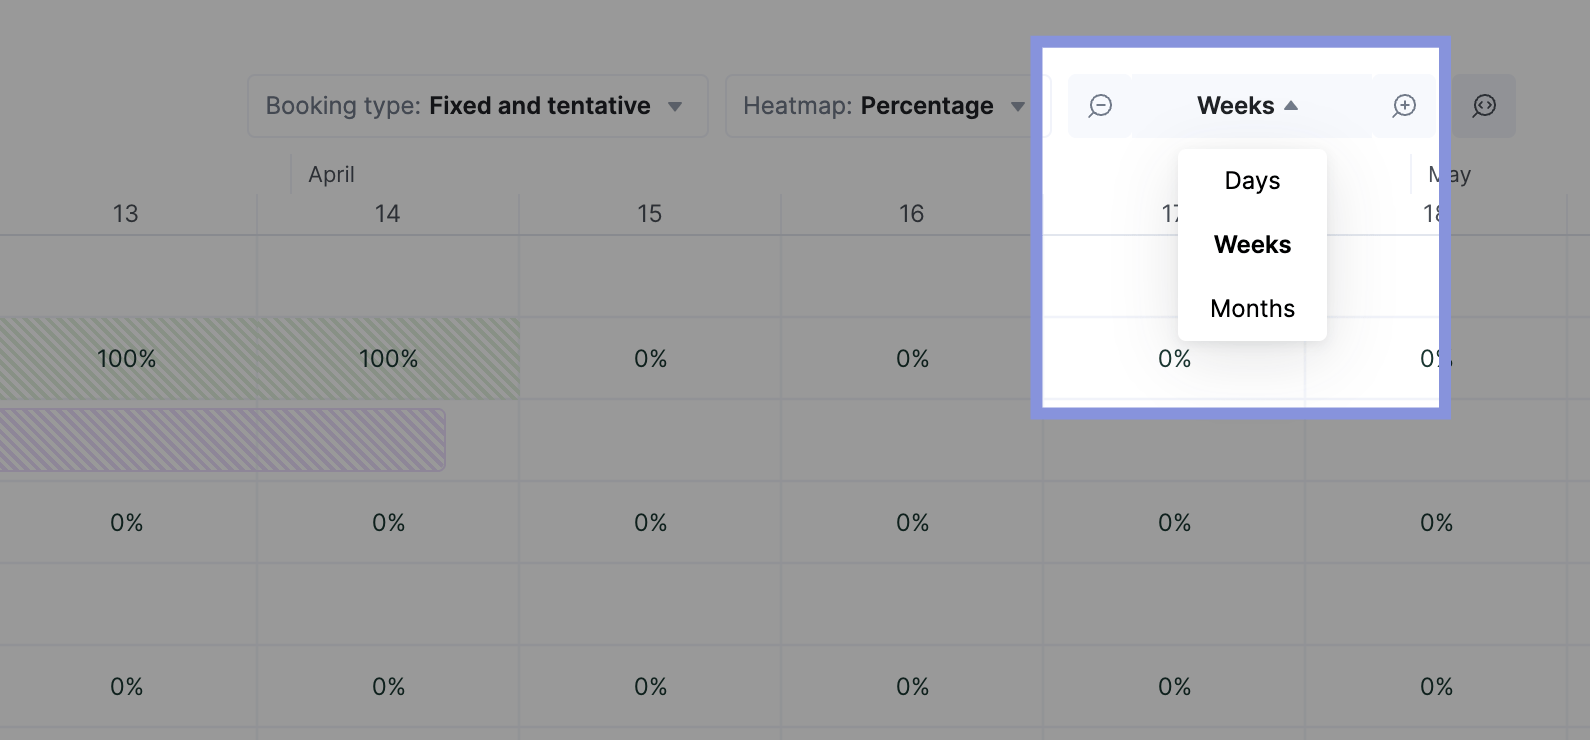
Need a longer-term view?
Switch the filter in the “Bookings” tab from days to months to prevent scheduling conflicts down the line.
Step 3: Assign team members to project work
Once you’ve resolved calendar conflicts and finalized the role-based schedule, it’s time to assign specific team members to replace placeholder roles.
When making assignments, consider both utilization rates and individual strengths to balance workloads effectively. Aim for a workload that maximizes productivity without overburdening anyone.
For example:
- If Senior Developer Jane has a utilization rate of 120% while Junior Developer Tom is at 60%, consider redistributing tasks from Jane to Tom. This helps Jane return to a balanced 75-80% workload while giving Tom valuable experience to apply in future projects.
- Alternatively, if a time-sensitive project requires faster results, you might assign Jane due to her ability to deliver high-quality work more quickly
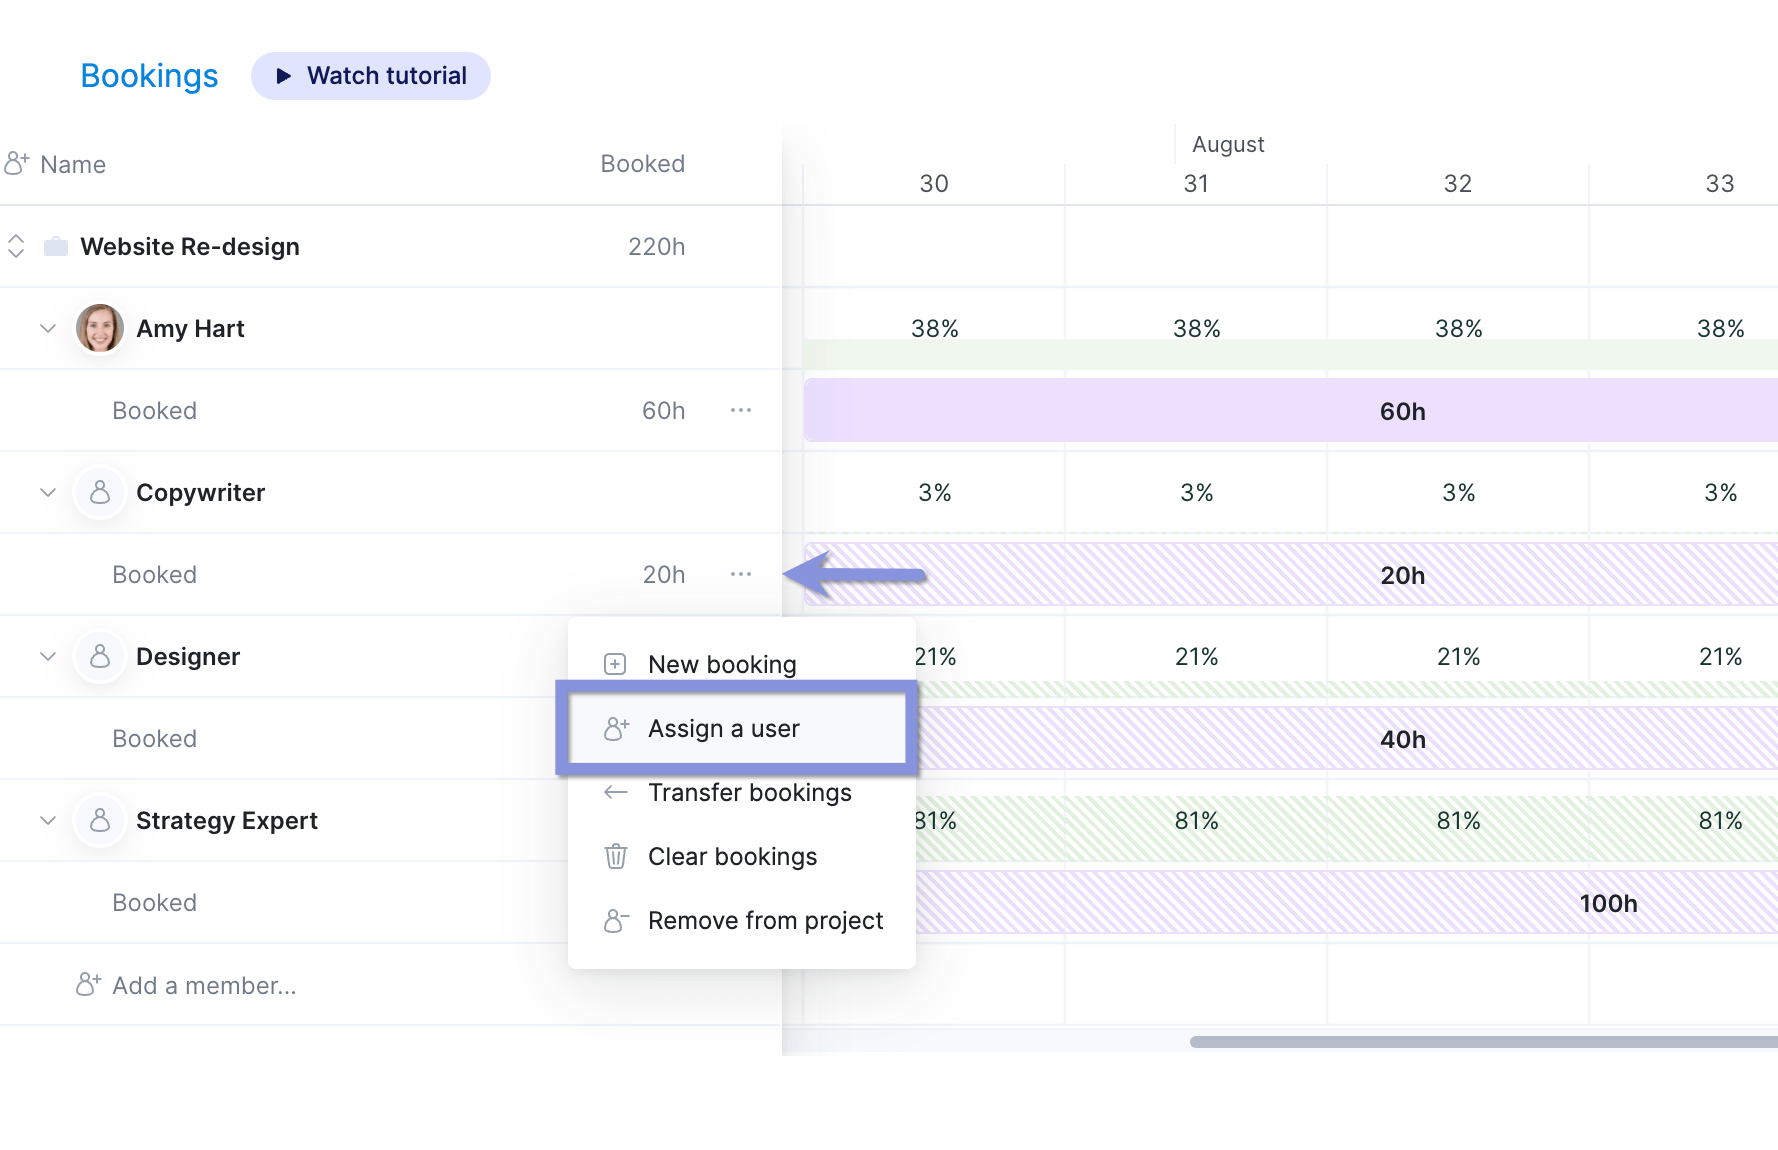
In Scoro, when assigning specific team members, click the three dots next to the placeholder role. Choose “Assign User” and select the appropriate team member.
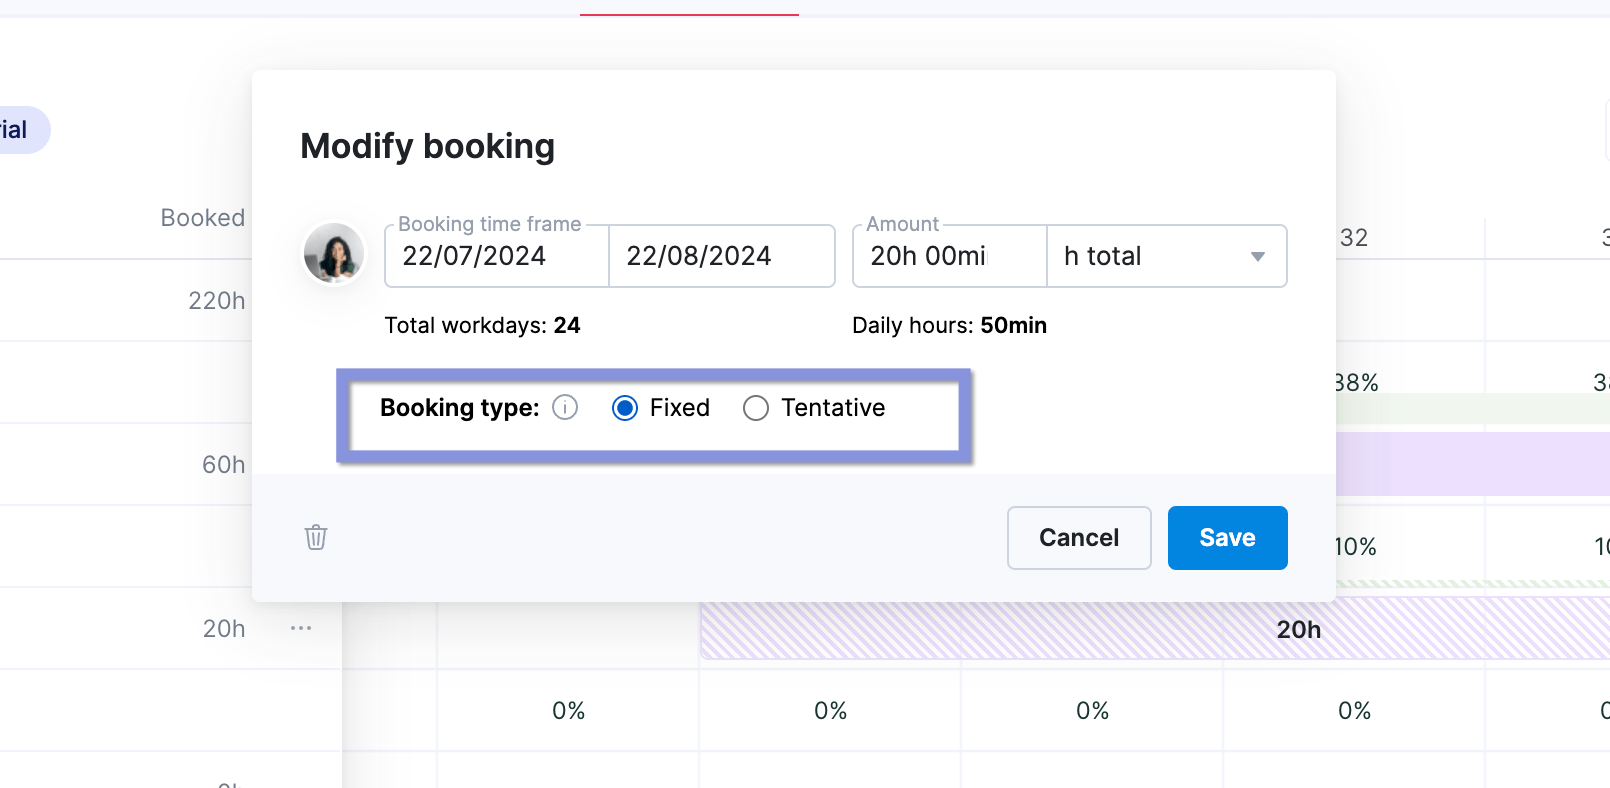
Once you’re satisfied, convert tentative bookings to fixed bookings.
Click the booking you want to confirm, and a window will appear. Then, simply change the booking from “Tentative” to “Fixed.”
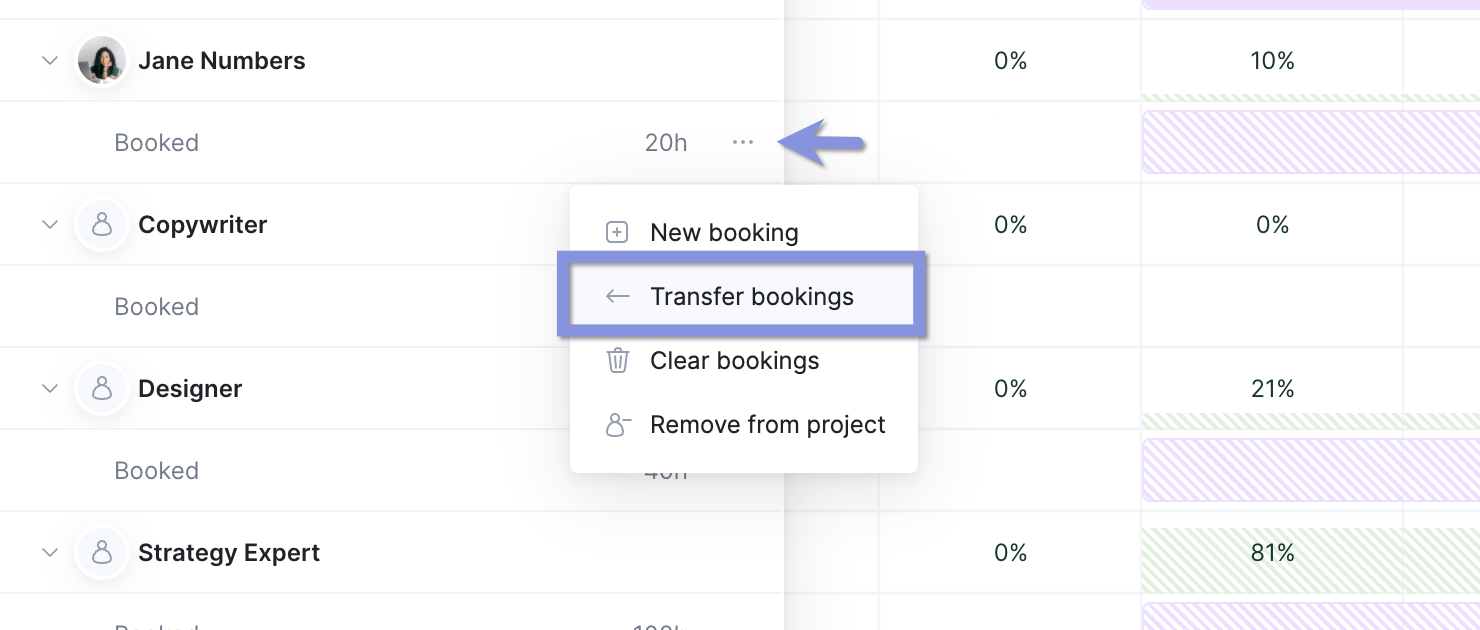
And if someone becomes unavailable, Scoro makes it easy to transfer work between team members.
You can transfer bookings by clicking the three dots next to the user’s name, choosing who to transfer the bookings to, and confirming the transfer by selecting “Transfer bookings.”
Step 4: Move onto resource scheduling for your team
With your resource plan in place, the next step is assigning actionable, day-to-day tasks to your team members.
Clear and well-defined tasks are critical for successful project execution.
Without them, team members may:
- Waste time trying to figure out what they should be working on
- Duplicate efforts by unknowingly working on the same things
- Miss important deliverables and deadlines
- Struggle to prioritize their work
- Feel disconnected from the project’s overall goals and progress
This is where you would head to the “Planner” view in Scoro.
The “Planner” lets you drag and drop tasks from a list onto team members’ calendars to assign work and set deadlines.
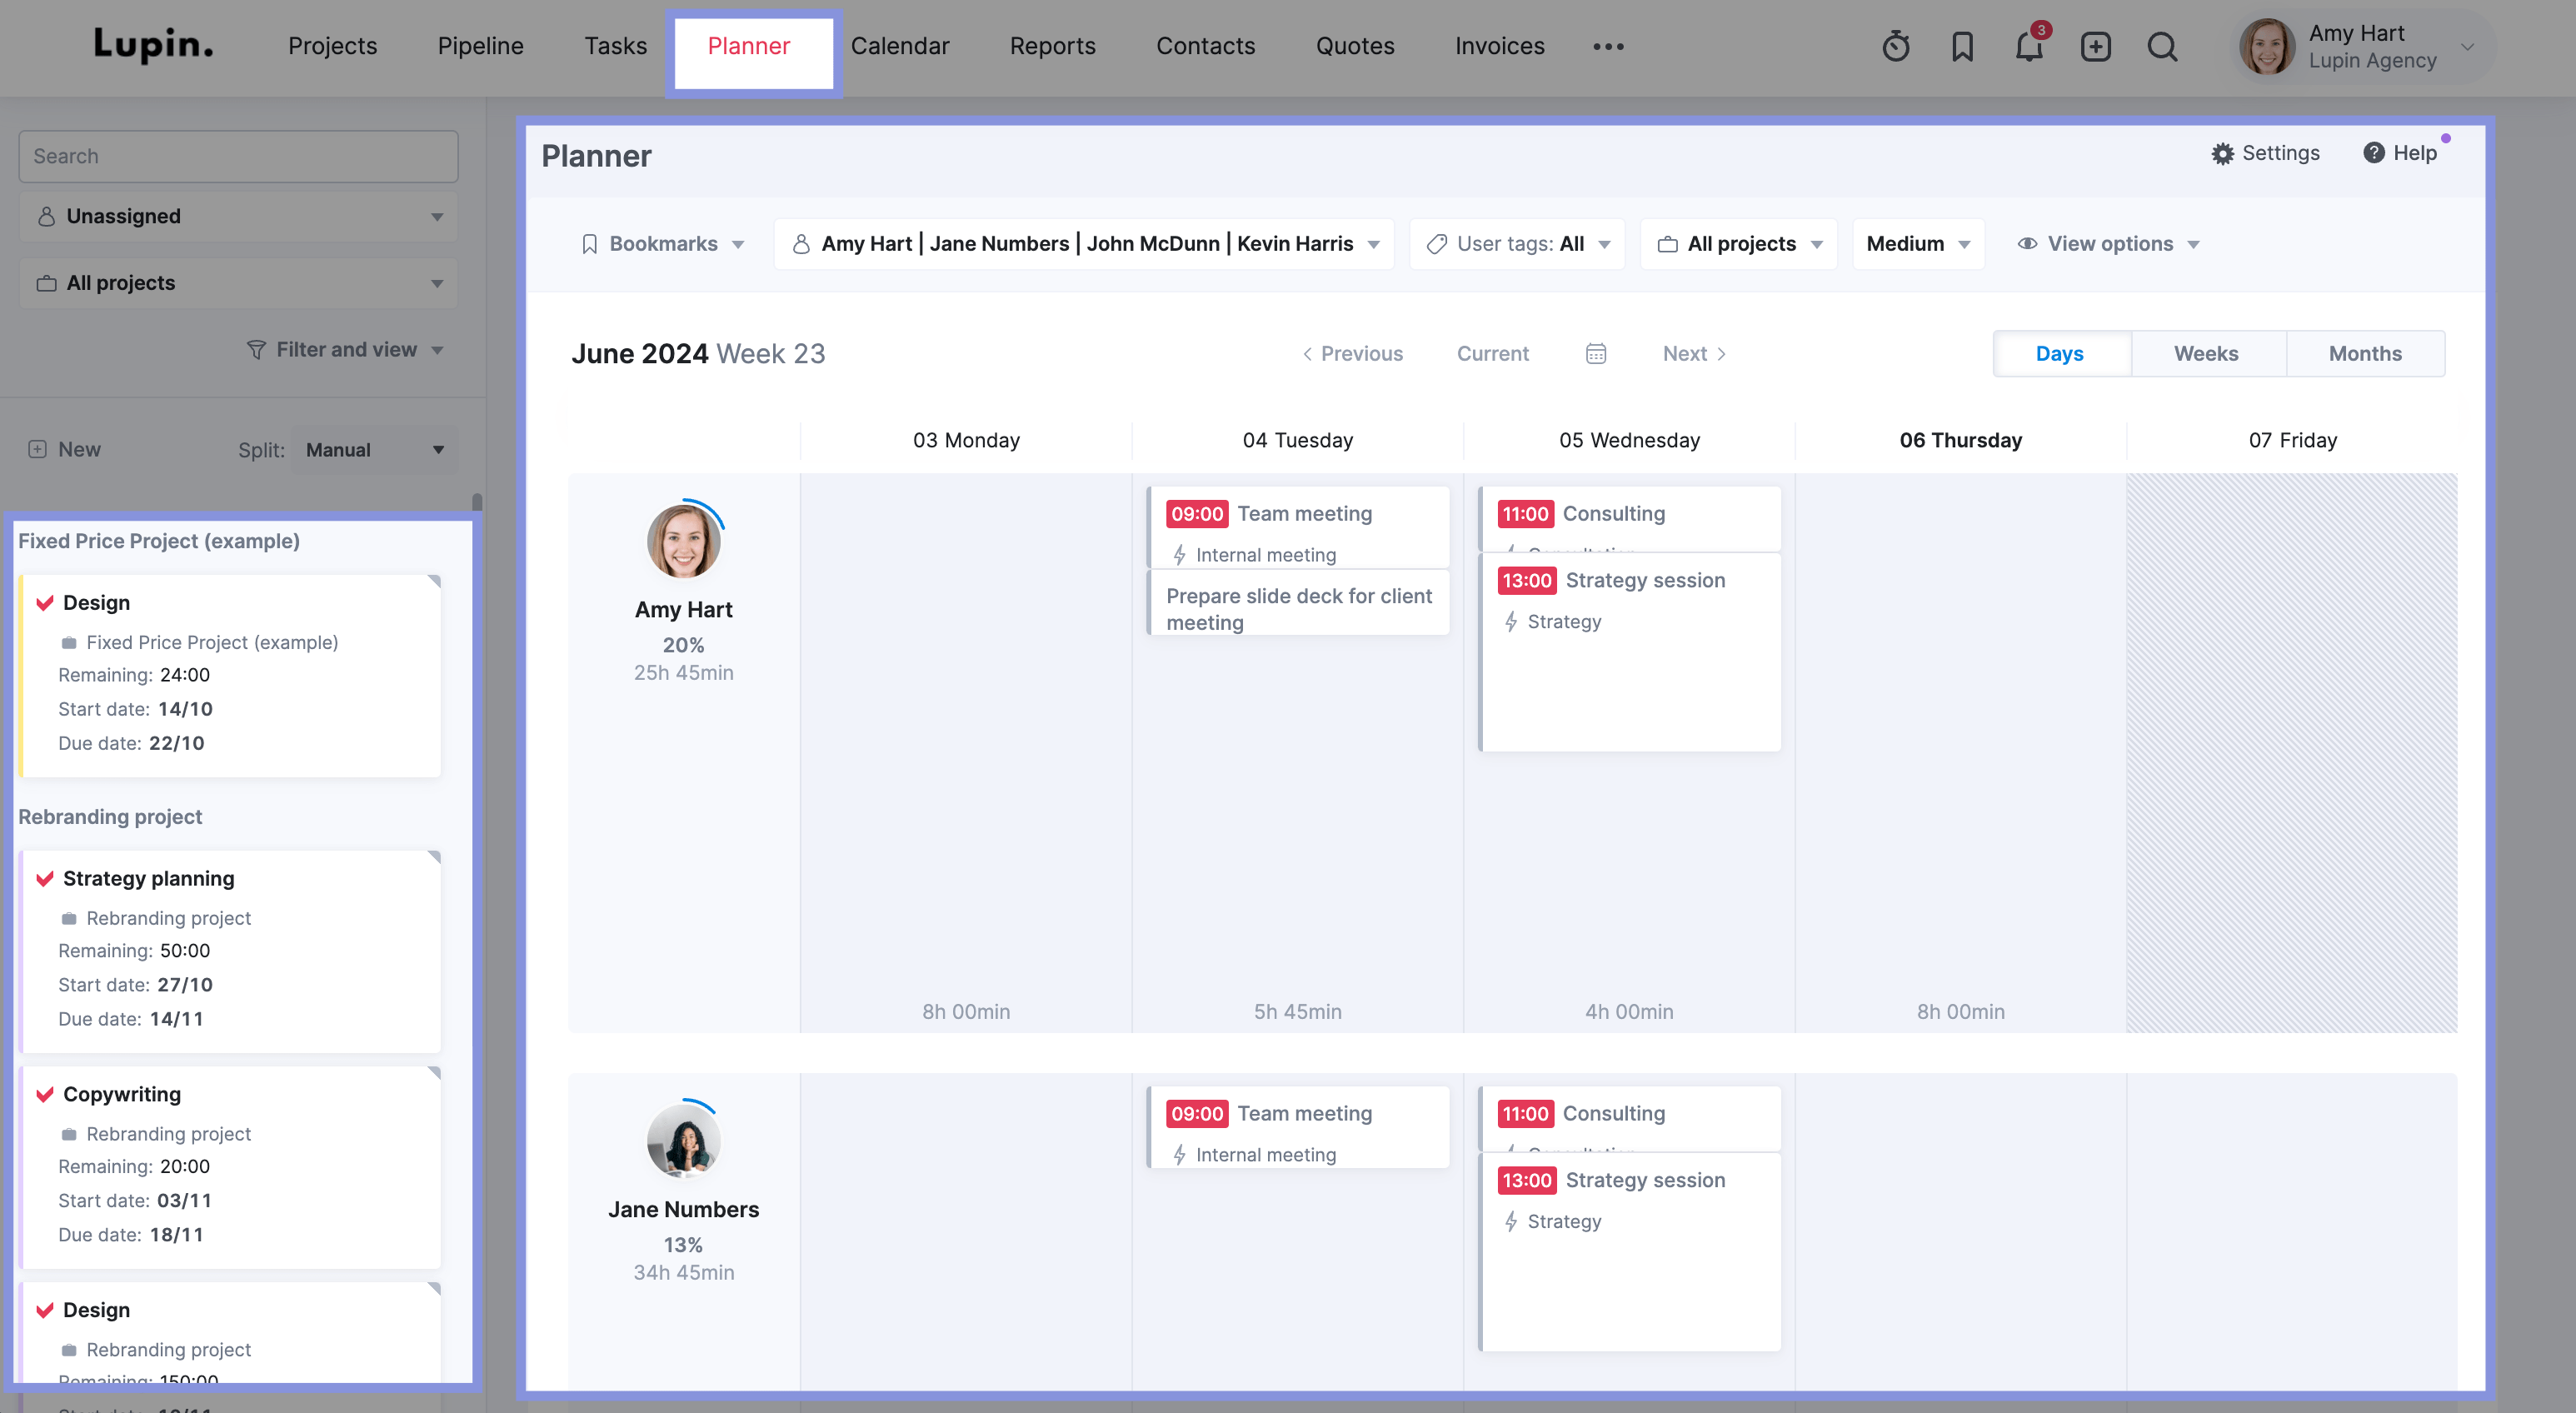
But be sure to include team members in conversations about task assignments. This shows them that you care about their input and strengthens collaboration. And they may have insights about timelines, potential challenges, or resource needs that you haven’t considered.
Imagine you’re managing a website redesign project. After speaking with UX designer Sarah about her workload, you can now:
- Drag and drop the “UX Research” task to her schedule for the first week
- Create a new “Wireframe” task and assign it to her for the second week
- Add a “Visual Design” task for your graphic designer, Mike, scheduling it to start after Sarah’s wireframe is complete
- Adjust the duration of surrounding tasks if needed by simply resizing them in the visual interface
Check out our guide on resource scheduling for more info on assigning work to your project teams.
Best practices for resource planning
Here are some best practices to streamline resource planning and optimize team performance:
- Use utilization benchmarks: For producers (developers, designers, copywriters), billable utilization should target 75%+ to maximize efficiency without overloading teams.
- Build in buffer time: Avoid scheduling employees at 100% capacity to accommodate unforeseen changes or urgent tasks
- Review resource allocation weekly: Conduct weekly check-ins to balance workloads and quickly adapt to shifting priorities
We reached out to Harv Nagra, Host of The Handbook: The Agency Ops Podcast & Head of Brand Comms at Scoro, to get his take on why tracking utilization is so important.
Checking utilization metrics weekly isn’t just about balancing workloads—it’s about staying ahead of bottlenecks before they impact delivery. The best agencies don’t just react to capacity issues; they anticipate them. Having real-time visibility into utilization lets you optimize resources, keep projects on track, and prevent burnout before it happens.
Learn more about setting the right utilization targets in our resource utilization guide
Resource planning tools: Are they needed?
Managing resources across multiple projects can quickly become overwhelming—especially when teams are juggling shifting priorities, deadlines, and competing demands.
While spreadsheets might work in the early stages, they often fall short when it comes to scalability, visibility, and efficiency.
A dedicated resource planning tool helps you:
- Automate scheduling: Reduce manual workload and eliminate guesswork
- Gain real-time visibility: Spot overbooked and underutilized team members instantly
- Forecast capacity accurately: Plan ahead to prevent resource bottlenecks
- Adapt quickly: Easily adjust assignments as priorities change
For example, one of our customers, Design de Plume, a creative agency, struggled with inefficient resource scheduling.
Before using Scoro, projects were assigned based on who was available, rather than who was best suited for the work. This led to inefficiencies, skill mismatches, and uneven workloads.
With Scoro’s resource planning tools, they now allocate work based on both availability and expertise, ensuring that the right people are assigned to the right projects at the right time.
Want to improve your resource planning process?
Start your 14-day free trial of Scoro today.


