











You know how things work. The question is whether your team does—or whether that knowledge walks out the door the moment you do.
Our research into 303 professional services firms found that only 21% have documented best practices. The other 79% are running on institutional knowledge.
Which means onboarding takes longer, quality depends on who’s staffed on a project, and every departure walks out with know-how nobody wrote down.
Most ops leads already know this. Few fix it, because documenting every process feels like an open-ended project. Where do you even start? And how do you stop it from going stale the moment it’s published?
This guide is that starting point: a practical method for building an ops handbook. A living internal site where every core system and process is documented, owned, and kept current.
Step 1: Decide where the handbook will live
Before you write anything, choose where you’ll store the handbook. This way, you don’t wind up with 20 different processes saved across shared drives and individual desktops.
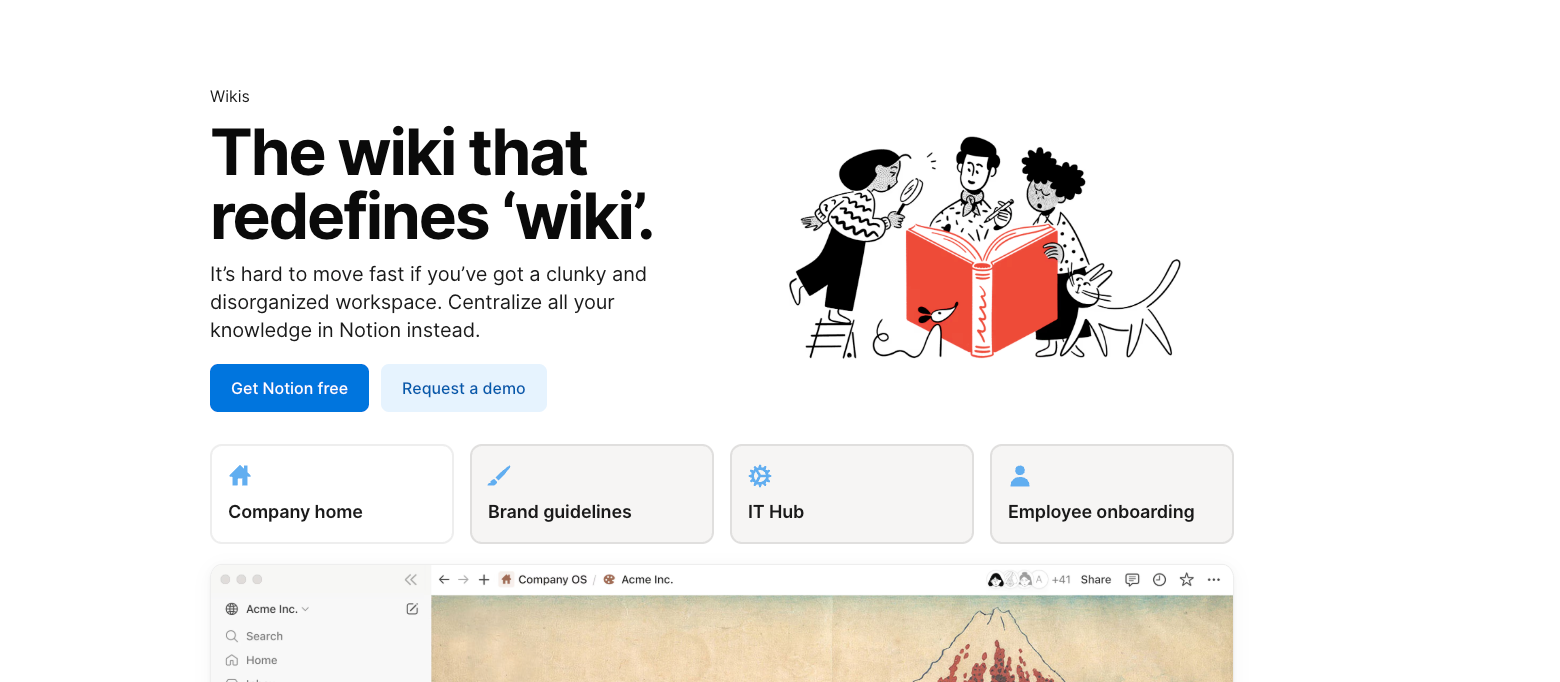
For example, Notion is an easy starting point for a lot of teams. It’s simple enough that anyone can edit it. And it has a large library of ready-made templates.
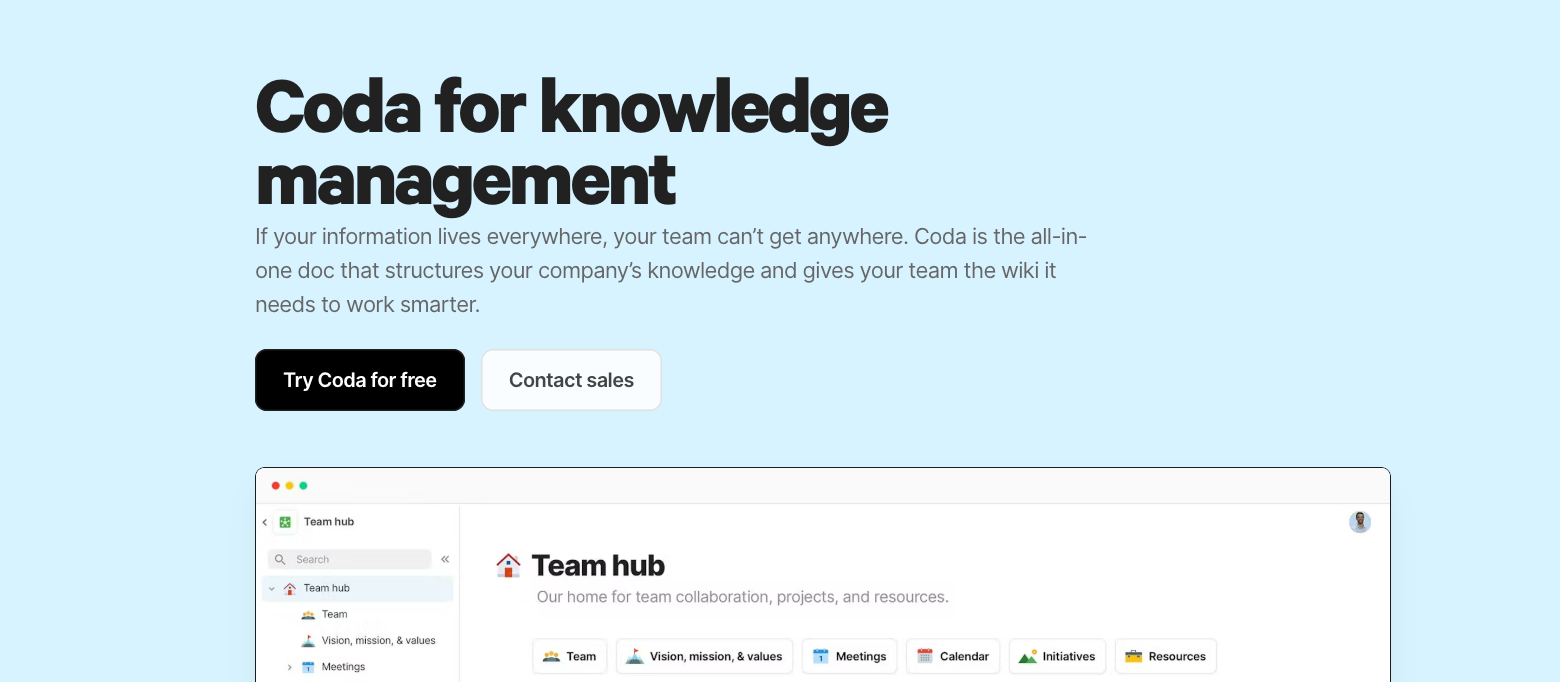
If you’re looking for something more advanced—like linking processes directly to live databases, automating updates, or creating an intranet—consider Coda.
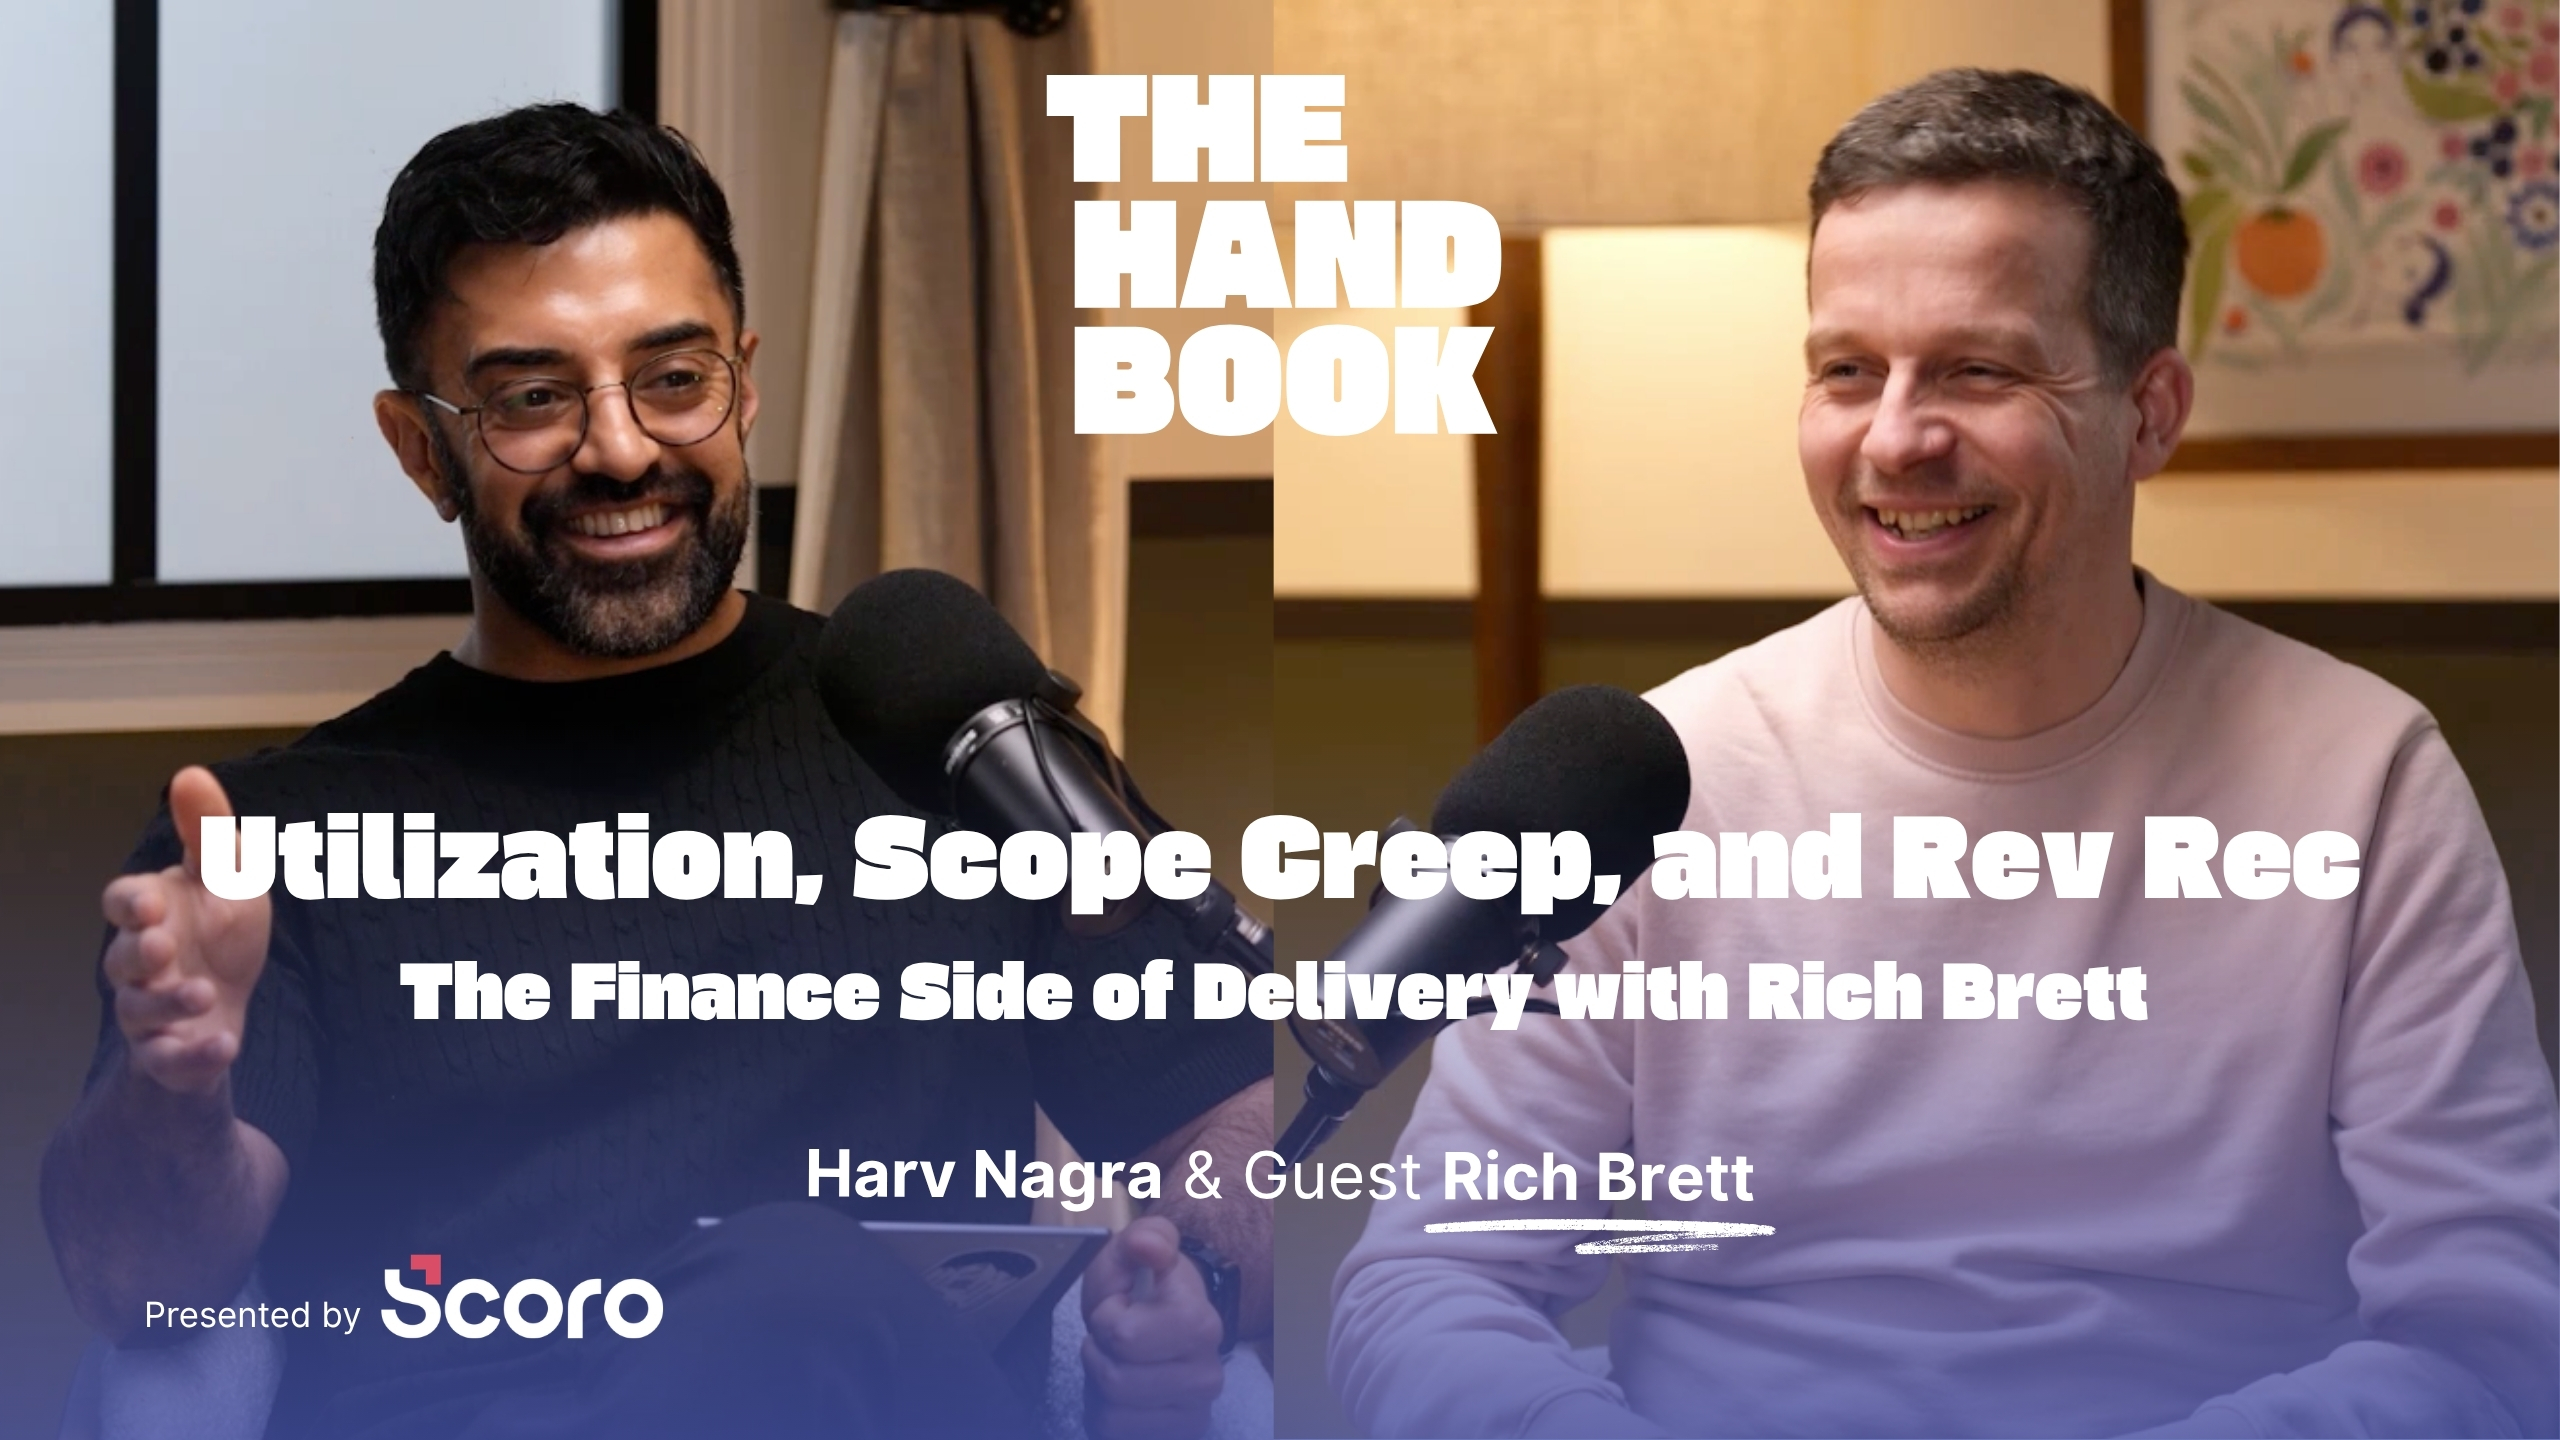
It’s what Harv Nagra used in his previous role as Group Director of Operations at Saentys, a multi-office creative agency, before he went on to host Scoro’s The Handbook podcast.
Harv also noted that Coda’s pricing plan made it a great fit for his team:
“If you’re looking to control costs, it’s probably the single most cost-effective platform. You only need to pay for document creators. If that’s just one person, that’s all you have to pay—it’s only $10 per doc maker per month on the Pro annual plan.”
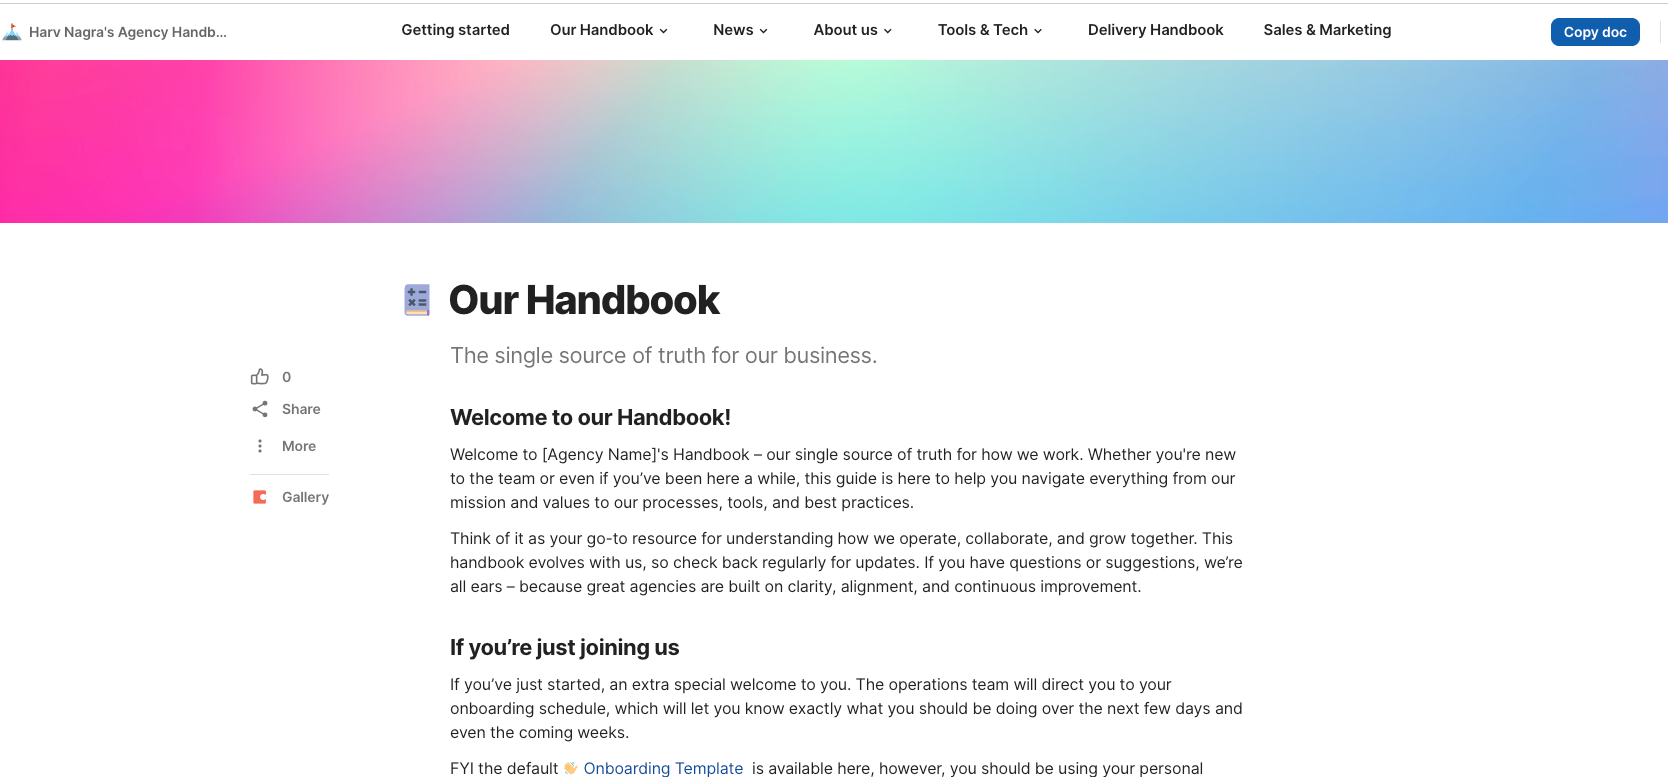
Check out Harv’s Coda handbook template as a starting point. Instead of building from scratch, you can just duplicate it and adjust as needed.
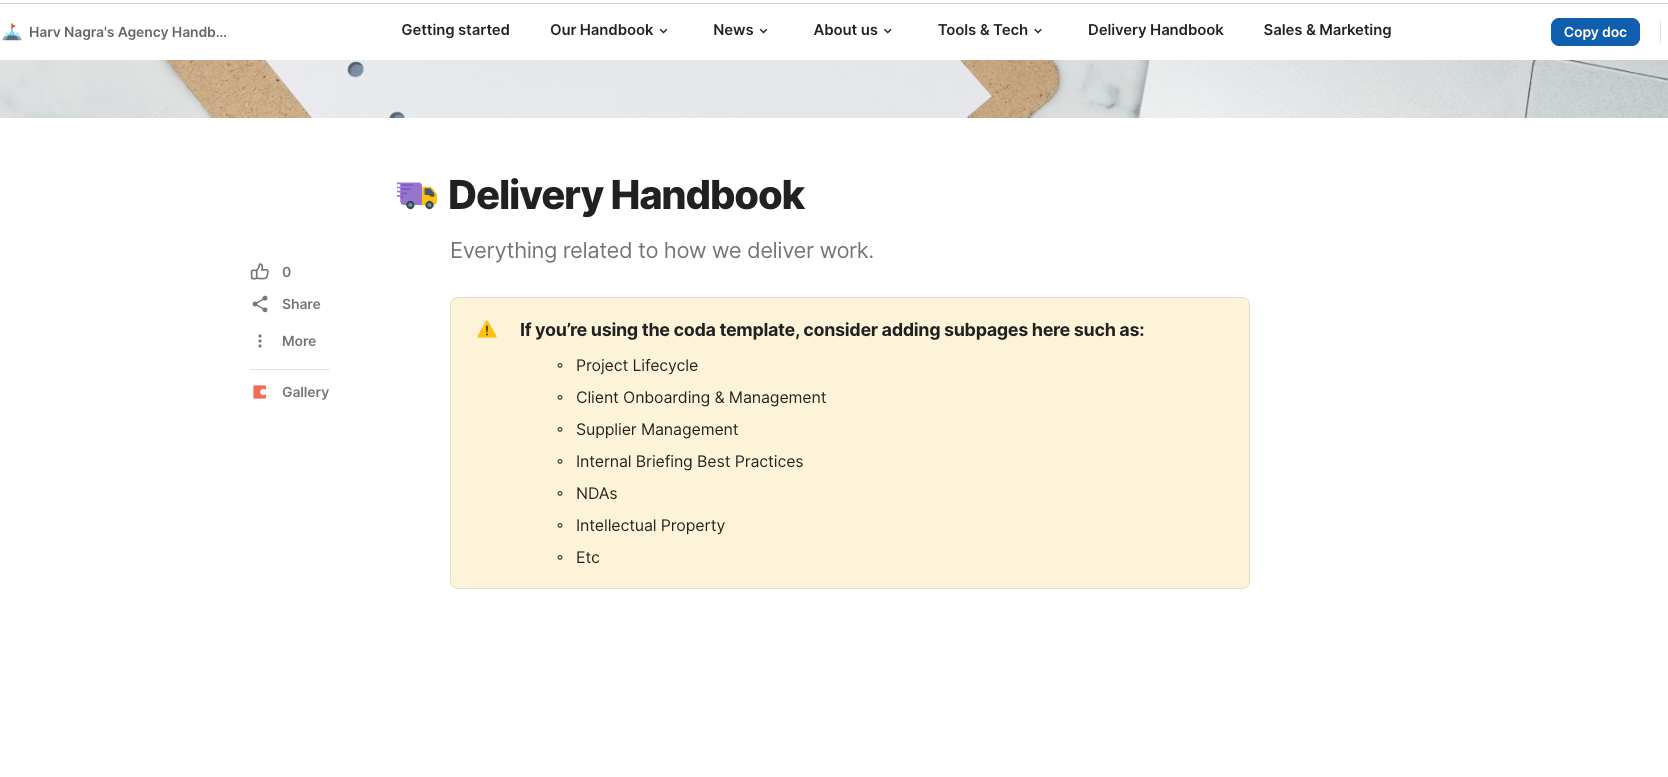
It comes with pre-made sections for your people and culture, Tools & Tech, Delivery Handbook, and Sales & Marketing. And each has draft content and suggested sub-pages.
Whichever tool you pick, the goal is the same: create one clear, central hub for all your key processes that everyone can easily access. Not buried files that take teams forever to find.
Step 2: Start with the process that’s bleeding money or time
Figure out which processes cause the biggest headaches and cost the most money or time. This way, you can solve the toughest pain points first.
To do this, start with the numbers.
Pull your last three months of project data and look for any:
- Projects that ran over budget
- Projects or service types with lower-than-expected margins
- Late or disputed invoices
- Time logged against the wrong projects
Meredith Fennessy Witts, founder of Le Chéile, a finance and operations consultancy for creative agencies, calls this “operational detective work.”
Often, operational inefficiencies show up first in the numbers: low margins, scope creep, or payroll that’s outpacing revenue. I look for financial patterns. Which projects are consistently running over budget? Are sales lagging because of a sales process that hasn’t evolved as the agency has scaled?

Then, survey your team.
Your data will tell you which processes are producing bad outcomes. Your team will tell you which ones create bad experiences—for them and clients. You need both insights to decide which processes to fix first.
Have team leads send out these five questions:
- What’s the one thing you most often have to chase, remind people about, or fix after the fact?
- When you started, what took you longest to figure out — and how did you eventually learn it?
- Is there a task you dread because it’s unclear, inconsistent, or just takes longer than it should?
- Have you ever done something a certain way, then found out a colleague does it completely differently? What was it?
- If you could change one thing about how work flows through the team, what would it be?
Then, cross-reference what you find.
If the same process shows up in both the data and the team feedback, that’s your starting point.
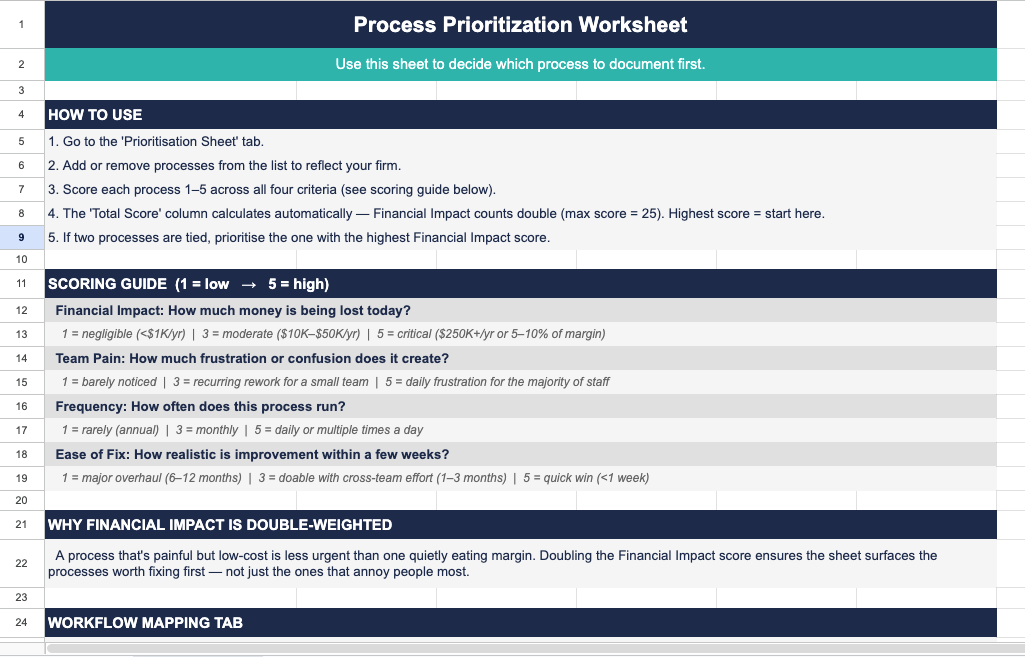
Keep things clear with our process prioritization worksheet. With over 30 different listed processes, it’s a clear, thorough way to evaluate what is and isn’t working.
Top Tip
The same worksheet also has a Workflow Mapping tab you’ll use later, in Step 4, to map out the fixed version of each process.
Here’s a brief example:
| Process | What the numbers say | What your team says |
|---|---|---|
| Quoting/estimation | Projects regularly finish over budget. Margins shrink post-kickoff. | “We duplicate old quotes for speed” “Delivery never reviews before quotes go out” |
| Client onboarding | High early churn or dissatisfaction. First-phase overservicing. | “The first two weeks are always chaos” “We explain the same things to every new client” |
| Project kickoff | Inconsistent delivery across teams. Scope disagreements early in projects. | “Every kickoff looks different” “Clients always ask the same questions we should’ve addressed earlier” |
| Time tracking | Utilization reports have gaps. Overruns only surface at invoice. | “People log time at the end of the week from memory” “We’re never sure if hours are logged on the right project” |
| Invoicing | Late payments. Disputed invoices. Manual chasing every month-end. | “Nobody knows who’s responsible for invoicing or chasing” “Invoices usually have errors” |
| Resource planning | Overcommitment. Double-booked team members. Last-minute scrambling. | “We say ‘yes’ to every incoming project without knowing if we’ll have resource” “We let clients squeeze in work because we’re scared of saying ‘no'” |
| Supplier/contractor management | Purchase orders missing. Cost reconciliation takes hours at project close. | “We don’t always raise POs” “Outsourced costs are never tracked properly” |
| Project closure | Revenue recognized late. Retrospectives don’t happen. Lessons not captured. | “Projects don’t have a clear closing process” “We never get around to the debrief” |
Then, score each process across four criteria:
Financial impact (double-weighted): How much money is this process costing you today?
- 1 = Negligible (under $1,000/year)
- 3 = Moderate ($10,000–$50,000/year)
- 5 = Critical ($250,000+/year)
Team pain: How much frustration or confusion does it create?
- 1 = Barely noticeable
- 3 = Consistent annoyances for a small team
- 5 = Daily frustration for the majority of staff
Frequency: How often does this process run?
- 1 = Rarely (once a year)
- 3 = Monthly
- 5 = Daily or multiple times a day
Ease of fix: How realistic is improvement within a few weeks?
- 1 = major overhaul (6–12 months)
- 3 = doable with cross-team effort (1–3 months)
- 5 = quick win (1-2 weeks)
Unlike the other three criteria, Ease of Fix measures how fast you can act, not how bad the problem is. A high total score means a process is both painful and fixable right now, not just painful.
The worksheet’s Total Score column runs this formula for you automatically:
(Financial Impact × 2) + Team Pain + Frequency + Ease of Fix = Total Impact Score
Financial impact counts double because it carries the most gravity. A process that’s tedious but low-cost is usually less urgent to address than one cutting into your margins.
Here’s an example for a quoting process:
| Criterion | Score | Reasons |
|---|---|---|
| Financial Impact (×2) | 5 (x 2) | Projects regularly finishing 15–25% over budget — margin lost before delivery even starts |
| Team Pain | 4 | Account Managers/Directors rushing quotes, delivery frustrated by scope surprises, finance chasing reconciliations |
| Frequency | 4 | Multiple quotes going out per week |
| Ease of Fix | 5 | Needs a template and a review step—cross-team but doable in a week or so |
| Total | 23/25 |
The highest total score is the process you tackle first. If two processes tie, prioritize whichever has the higher Financial Impact score.
Step 3: Observe processes in action
Once you’ve identified the most challenging processes, go learn how they actually unfold.
As Ashley Madden, director of operations at Ten Speed, an SEO and content marketing agency, explains:
I want to understand how the process functions in real life, not just on paper. Often, there’s a gap between how a process was designed and how people actually use it day to day.

Say you’re reviewing your quoting process. On paper, it’s supposed to look like this:
- Account Manager/Director drafts scope
- Delivery lead reviews estimates
- Finance checks rates
- Quote approved
- Send to client
Here’s what you actually observe:
- Account Manager/Director duplicates an old quote and tweaks the hours quickly
- Uses a blended rate with no role breakdown, forgets to add a markup to purchases, and doesn’t include project management time
- Sends it without delivery review
- Adds a last-minute discount to “get it over the line”
Which means quotes are being underestimated by 15–25%. So margins are shrinking before projects have even started.
That’s what you’re looking for: how people actually execute the process during the work day, regardless of how it’s written down.
Check in with everyone who touches a specific process, not just the primary owner. Because a project manager, a delivery lead, and a finance person will each give you a different version of what actually happens.
Ask them to record a walkthrough on a tool like Loom. Have them narrate what they’re doing (and why) as they go. Ask them to pull any shared docs, templates, or Slack messages they use along the way, too.
Once you have the recording, export the transcript. From here, you can review it yourself or run it through an AI tool to flag red flags faster. It works off the transcript alone, checking for gaps in how the speaker explains their own steps, not comparing against a separate “ideal” version:
| You are an operations consultant reviewing a transcript of a team member walking through one of their workflows. Your job is not to document the process. Your job is to identify what’s missing, unclear, or inconsistent—so the ops lead knows what to investigate before writing the guide. Analyse the transcript and return: Steps that are skipped or assumed—things the speaker does but doesn’t explain, or references without describing Undocumented decisions—moments where the speaker makes a judgement call with no stated rule (look for: “it depends”, “usually”, “sometimes I…”, “we tend to…”) Missing handoffs—where does this person’s involvement end? Who picks it up next, and is that clearly stated? Tools or systems referenced but not explained—names dropped without context (e.g. “I put it in the system”, “I send it over to them”) Gaps to investigate—specific questions to ask the speaker in a follow-up conversation before documenting this process Rules: Do not write the process guide. Only identify gaps. Be specific. For each gap, quote the relevant part of the transcript.If something is clear and well-explained, do not flag it. Here is the transcript: [paste transcript] |
Using this prompt, you’ll get a list of specific questions to ask the speaker—the “Gaps to investigate” section above, before you clean up the process in Step 4. Much faster than trying to spot gaps yourself in a raw transcript.
Step 4: Fix the processes before they go into the handbook
If you document bad processes as they are just for the sake of centralizing them, you’re not going to resolve anything.
The point of watching it happen isn’t just to transcribe it. Take what you learned from the bad process—the gaps you observed firsthand, plus whatever the AI review flagged—and use it to design something better.
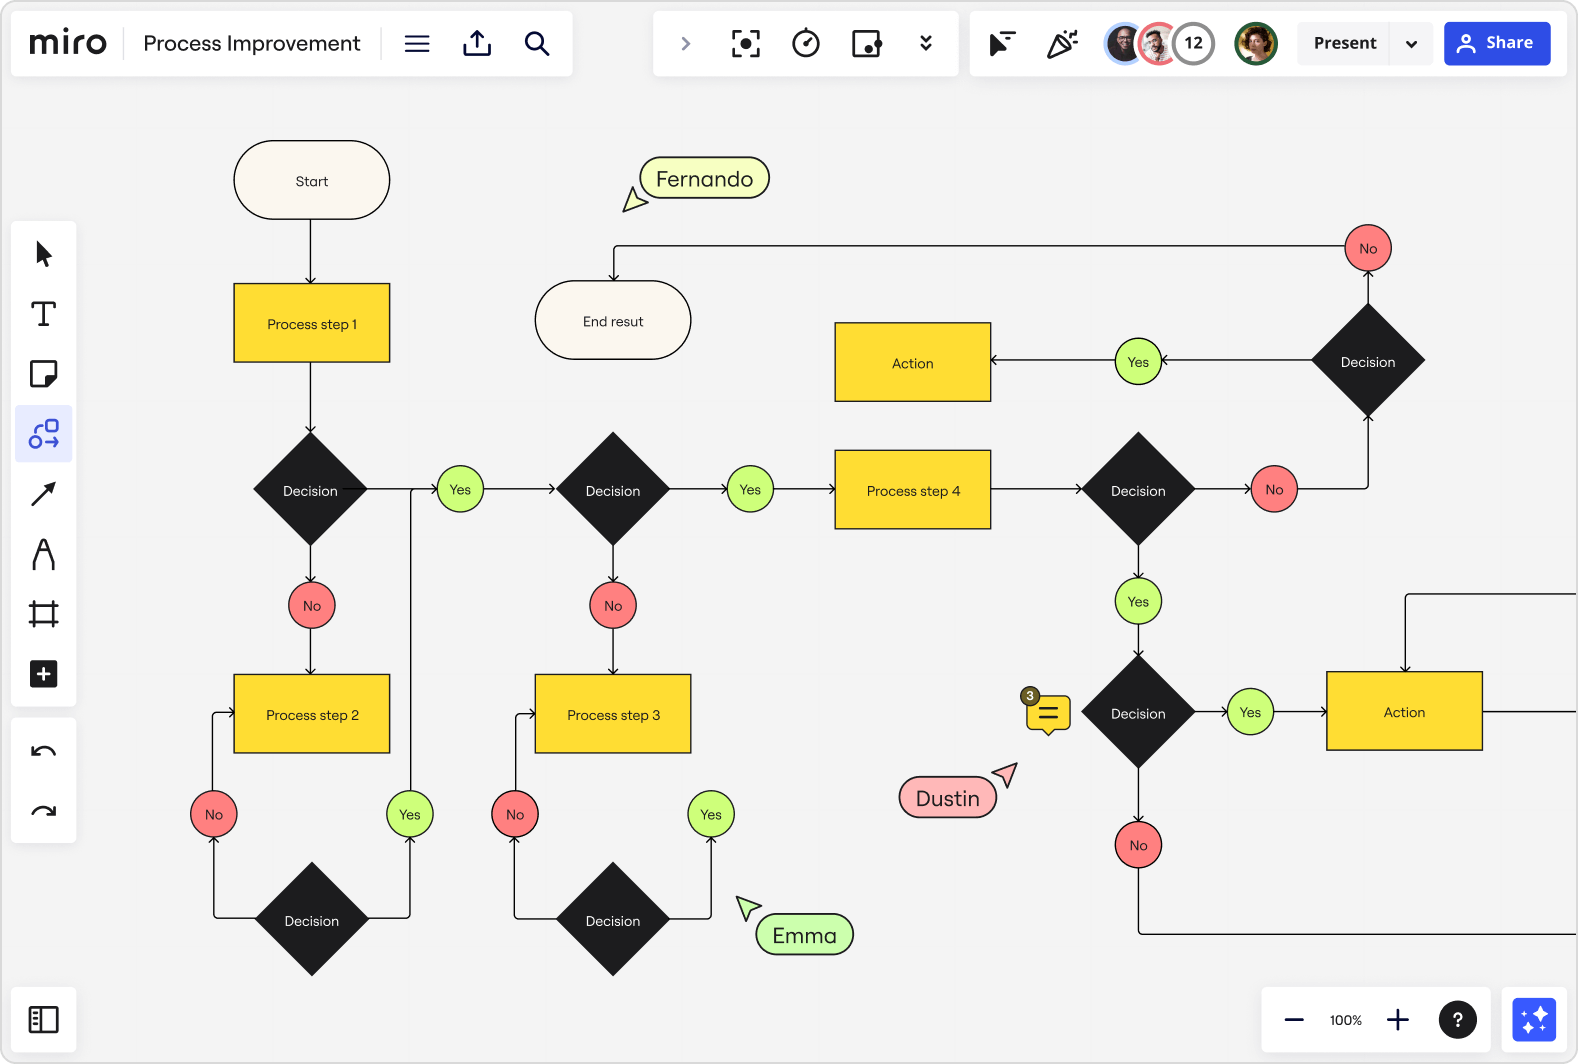
Draw out the new, ideal workflow with a tool like Miro’s free SOP process template, or ask an AI tool like ChatGPT or Claude to draft a first pass from your observations, then refine it.
This way, you can easily visualize it from start to finish and identify different handoffs and areas to change.
Meredith recommends this approach, too:
I map the process as a flowchart while jotting notes or using AI to capture thoughts in real time. Cross-referencing the visual with a step-by-step helps me spot gaps—but the most important step is validating it with the people actually doing the work.
Be as specific as possible—especially when it comes to handoffs. Make it clear when one person’s job is finished and what triggers the next person to step in.
Once you have a draft finished, run it by the people involved and at least one person who isn’t. This way, you can easily test:
- Whether the process is realistic
- Whether the instructions are clear
- Which steps are inaccurate
Then, you can correct any issues before you put the new process in the handbook.
Once you’ve got a clear, accurate process, use the “Workflow Mapping” tab in our process prioritization worksheet to organize the new details. This is the Workflow Mapping tab flagged back in Step 2. Then use it to guide your screen recording to generate your written guide in Step 6.
Don’t know who the process owner is yet? Leave that field as “TBD” — Step 5 covers how to figure that out.
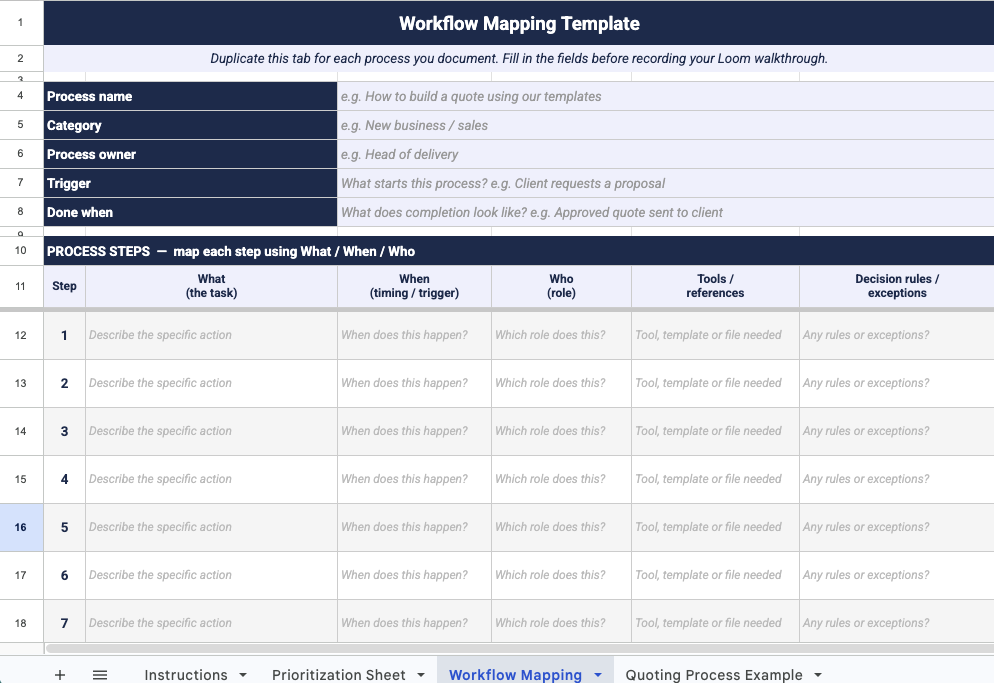
Under “Process Steps,” fill out:
- What: The specific task (e.g., “check team availability”)
- When: The timing or trigger (e.g., “when scoping a potential project”)
- Who: The responsible role (e.g., “ops coordinator”)
- Tools/references: Specific software or notes needed to complete the task (e.g., “Scoro’s Utilization report”)
- Decision rules/exceptions: Any step that deviates from the norm under special circumstances (e.g., “if the team isn’t available for the proposed start date, flag it before the quote goes out”)
Again, specificity is key. Kristen Kelly, agency profitability consultant at Parakeeto, recommends adding whatever supporting detail isn’t obvious from the step name itself. The rate card, the margin guardrail (the minimum margin you’ll accept before a quote needs sign-off), the scoping checklist, etc.
Step 5: Designate process owners
Documenting a process and owning it are two different things. Most firms end up with task owners when what they need are process owners.
There’s a big difference between them:
- Task owners complete the work
- Process owners ensure a successful outcome, evolve the workflow over time, and handle issues
As Meredith notes, process ownership is key to creating consistent, profitable systems for the long run:
Rolling out a process is as much about people as it is about systems. I recommend identifying a process owner to champion it internally, build in space for team feedback, and show how the change improves both their daily work and the agency’s bottom line.
Ops usually owns a new process by default, since they’re the ones who built it, but that should last 60–90 days, not forever. Use that window to watch who on the team naturally steps up, then hand ownership to them.
Process ownership should move to someone who’s:
- Close enough to the work to understand how the process actually runs and where it breaks down
- Senior enough to influence change and hold people accountable when steps aren’t followed
- Proactive about improvement, not just maintenance — willing to refine templates, update tools, and gather team input
After 60–90 days, you’ll usually see who checks the most boxes. Have a conversation with them to see if they’d be willing to own the process. And what that actually means for them (e.g., updating steps as needed, flagging breakdowns, etc.).
Step 6: Document the processes with clear written and video steps
Once you have your process finalized, document it in two formats: chronological written steps and a short video walkthrough.
As Ashley notes, this approach helps team members learn and retain info:
Ashley found this from experience:
To make processes stick, I document them in multiple formats: written steps with screen recordings of the actual workflows at the top of the SOP. That way, team members can either read or watch—whatever suits their learning style.
And you don’t need to wait on Step 5’s 60–90 day ownership window to do this. Roll the fixed process out to the team now, and keep documenting in parallel while you watch who naturally steps up to own it.
Use a tool like Loom to record yourself completing the workflow, following the Workflow Mapping tab you filled out in Step 4 as your guide, so nothing gets skipped or improvised on camera. Talk through what you’re doing (and why) as you go. And try to keep it under five minutes.
Then, to get your written steps, export the video transcript and paste it into an LLM (e.g., Claude, ChatGPT, Gemini) with this prompt:
| You are an operations consultant helping a professional services firm document their internal processes. I’m going to paste a transcript of someone walking through a workflow. Turn it into a short process guide using this structure: Process name: [short descriptive title] Trigger: What starts this process Steps: 5–8 numbered steps, each starting with a verb, written clearly enough for someone doing this for the first time Done when: What the completed output looks like Notes: Any decision rules, exceptions, or approval thresholds mentioned Rules: – Use only what’s in the transcript. Do not invent steps, tools, or rules. – The speaker may refer to themselves in first person (“I always do X”). Translate this into third-person role-based instructions (“The account manager does X”). If the role is unclear, write [ADD: role name]. – If something is referenced but unclear (e.g. a tool name, a threshold, a template), write it as [ADD: description of what’s needed] so I can fill it in. – Keep each step to one sentence. No preamble, no summary at the end.Here is the transcript: |
You should get a solid first draft in under a minute. Then, review the AI-generated steps and edit as needed.
Top Tip
For processes that are almost entirely tool-based (think lots of clicking through a system), you can also consider using a tool like Scribe. It documents the workflow automatically while you work through it and turns it into a step-by-step guide with screenshots. Fold that guide into your written steps, and the process becomes even easier to follow.
Step 7: Organize by clear processes, not vague topics
Once you have your new process steps and videos, the next decision is how to organize them so people can actually find what they need.
At first glance, a 30-page ops manual seems thorough and helpful. But to a new hire on day three, it’s an overwhelming wall of text.
Speed up learning and adoption with clear sub-sections organized by singular workflows, not vague departments. “How to build a quote” or “how to check team availability,” not “sales info.”
You can apply the same bite-sized structure beyond individual workflows, too. An onboarding schedule for each role, for example, that a new hire can duplicate and follow step by step.
Not only does this approach make it easier to find and retain info, but it makes it easier to update processes over time—you only have to update short instructions, not 30 pages of instructions.
Harv recommends this “bite-sized” approach, having used it successfully at Saentys:
I created something like 20 very modular bite-sized topics in the “How to use Scoro” section of our Handbook—how to check if a client exists in the system, how to create a quote using our templates, how to turn the quote into a project, how to raise an invoice, etc. On training day, people were going to see a lot and absorb very little. But since we created these modular guides, people would have a short video to watch whenever they needed to do something—not a manual to wade through. It was very reassuring to them and it reduced the amount of individual questions I had to field.

If you’re using Harv’s Coda template, create your “how-to” instructions as sub-pages under the relevant section—like adding client onboarding and kickoff info under “Delivery Handbook” and software-related processes under “Tools & Tech.”
Step 8: Get buy-in with formal training
Documenting processes is only half the battle. You still have to get people to actually follow the new workflows.
Pilar Suquilvide, founder of Your Agency COO, a fractional COO consultancy for agencies, puts it plainly:
Firms confuse documentation with adoption. Getting SOPs written feels like progress—but that’s the easy part. The hard part is changing how people actually work day to day.

Change is tough. Make it easier with these tips from Harv:
- Offer structured onboarding. At Saentys, Harv had new hires work through practice scenarios for key systems like Dropbox for Business and Scoro using only the handbook resources as their guide—no asking colleagues. This helped establish the handbook as the go-to resource from the start and built new team members’ confidence in their ability to tackle new tasks correctly. In Harv’s Coda template, you’ll find a pre-built “Onboarding” section.
- Constantly refer back to the handbook. Whenever someone came to Harv with a question, the answer was always the same: “Go to the handbook and check X page.”.” It forces teams to use it and learn from it.
Step 9: Update processes as needed
While it’s a huge achievement to put one together, writing a handbook doesn’t mean you can just check it off your to-do list.
To get the most value from it, it needs to evolve alongside the business. Besides adding brand-new processes, it’s just as important to update old ones.
It’s time to revisit a workflow when:
- People keep asking the same or similar process questions
- Your tech stack changes
- Role transitions take place
And whenever you make changes, make sure everyone knows about it. Whether that’s ops or the process owner from Step 5 doing the highlighting.
Check in with process owners regularly (monthly is reasonable) to make sure they have the support or resources they need to keep their processes current.
Harv notes that he would highlight updates in all-hands meetings, saying “We’ve got a new how-to video this month on X. If you’ve run into that before, go watch it.”
Final Thoughts
Most firms that try to document their processes get stuck in one of two places.
Either they never start. Overwhelmed by the scope of what needs to be captured. Or they build something that quietly dies: a folder of guides nobody opens, a handbook nobody knows exists, documentation that was accurate six months ago and hasn’t been touched since.
The nine steps in this guide are designed to avoid both.
Start with one process. Build it properly, make it unavoidable, and watch the habit form. Each guide you add makes the next one easier to build and the next new hire faster to get up to speed.
That’s the difference between documentation and a documentation system. A project you finish once, versus how your firm actually works every day.
Building a handbook is hard, but we hope this guide made it easier.
- Download the process prioritization workshee. Start with the process scoring sheet to identify where to begin.
- Get Harv’s Coda handbook template. Duplicate it and you have your structure. All that’s left is filling it in.
If you’re looking for more tips and want to see where you stack up against other firms, take our free quiz and check out the Maturity Gap report.
You’ll get a clear picture of where you stand today and how to move up the maturity curve.